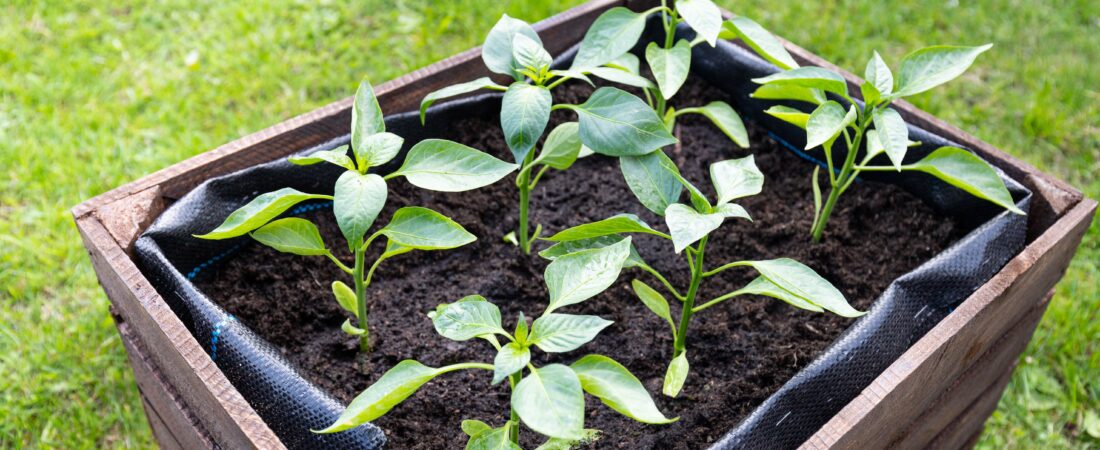
Short answer: yes, for most home vegetable gardens, raised garden beds are worth the money and the weekend it takes to build them. Not for every crop and not in every climate, but for the salads, tomatoes, herbs and beans most of us actually grow, they solve more problems than they create. I’ve gardened in open ground, in containers and in raised beds, and every time I’ve moved to a new garden, the first thing I’ve built has been a raised bed or two.
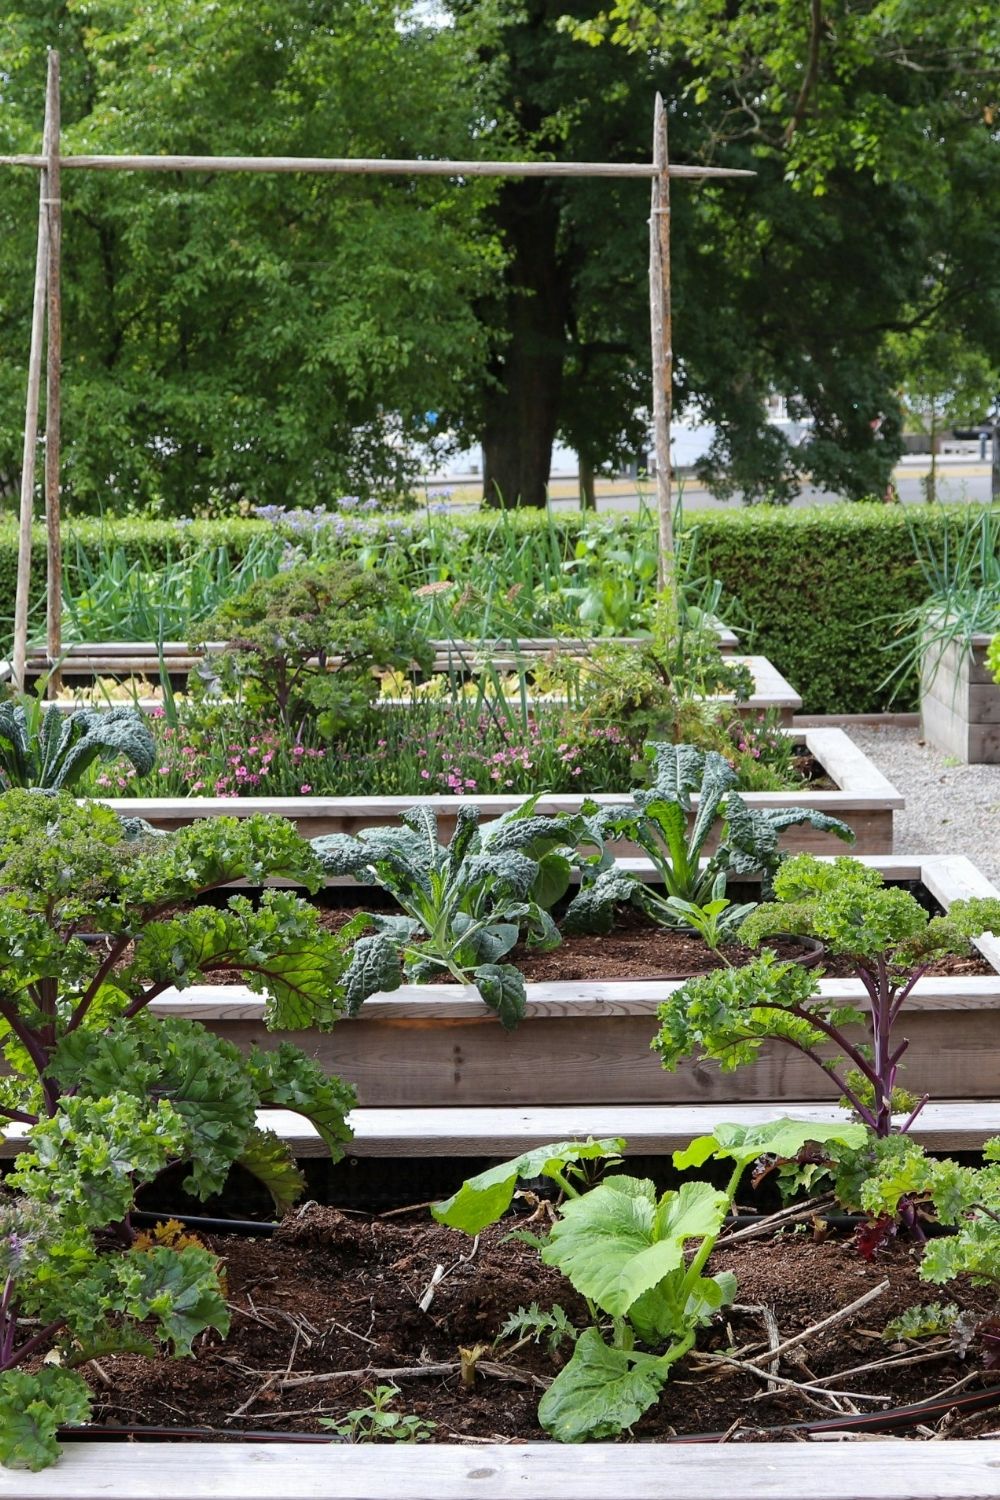
The kitchen garden above shows why they’re so popular: rows of low wooden beds full of kale, squash and greens, gravel paths between them, a clipped hedge behind and a pair of tall bean poles at the back. Everything is reachable, the paths stay clean, and the whole garden looks planned even halfway through summer. Below is what raised beds actually fix, where they don’t earn their keep, and what I’d do differently if I were building my first one today.
What raised garden beds actually fix
The biggest win is soil. When you build a raised bed, you choose what goes in it, which means you can skip years of fighting heavy clay, rocky ground or compacted builder’s fill. In my second garden, the ground was so solid that a spade bounced off it in August. The first raised bed I built there grew better lettuce in its first spring than the open ground did in three years.
Drainage comes next. Soil in a raised garden bed sits above the surrounding ground, so water drains away instead of pooling around roots after a storm. If your yard stays soggy for days after rain, raised beds are often the simplest fix; for bigger drainage problems, my post on backyard drainage goes further.
Then come the smaller wins that add up:
- Earlier starts in spring. Raised soil warms up and dries out faster, so you can sow peas and salads a week or two sooner.
- No compaction. You never walk on the growing area, so the soil stays loose and roots spread easily.
- Fewer weeds. A fresh fill starts nearly weed-free, and the few that blow in are easy to spot and pull.
- Less bending. Even a 12-inch bed saves your back, and taller ones can be worked sitting down.
- A tidier garden. Defined edges and clean paths make a vegetable patch look intentional year-round.
When they’re not worth it
I’d be lying if I said raised beds suit everyone. They’re a poor fit in a few situations:
- Hot, dry climates. Raised soil dries out faster, which is great in a wet spring and hard work in a desert summer. In very hot areas, beds at ground level or even sunken beds often do better.
- Space-hungry crops. Potatoes, corn, pumpkins and winter squash take up a lot of room for a modest harvest. If you have good ground, grow them there and save the raised beds for crops that need the extra care.
- Tight budgets and big areas. Lumber and soil add up quickly. Filling one 4 by 8-foot bed 12 inches deep takes about 1.2 cubic yards of mix, and that’s before you’ve bought a single plant.
- Good soil already. If your ground is deep, loose and well drained, you may get most of the benefit simply by edging a bed and adding compost every year.
Building one: materials and sizes
A basic wooden raised bed is a straightforward weekend project: four sides, screwed together at the corners, set level on the ground.
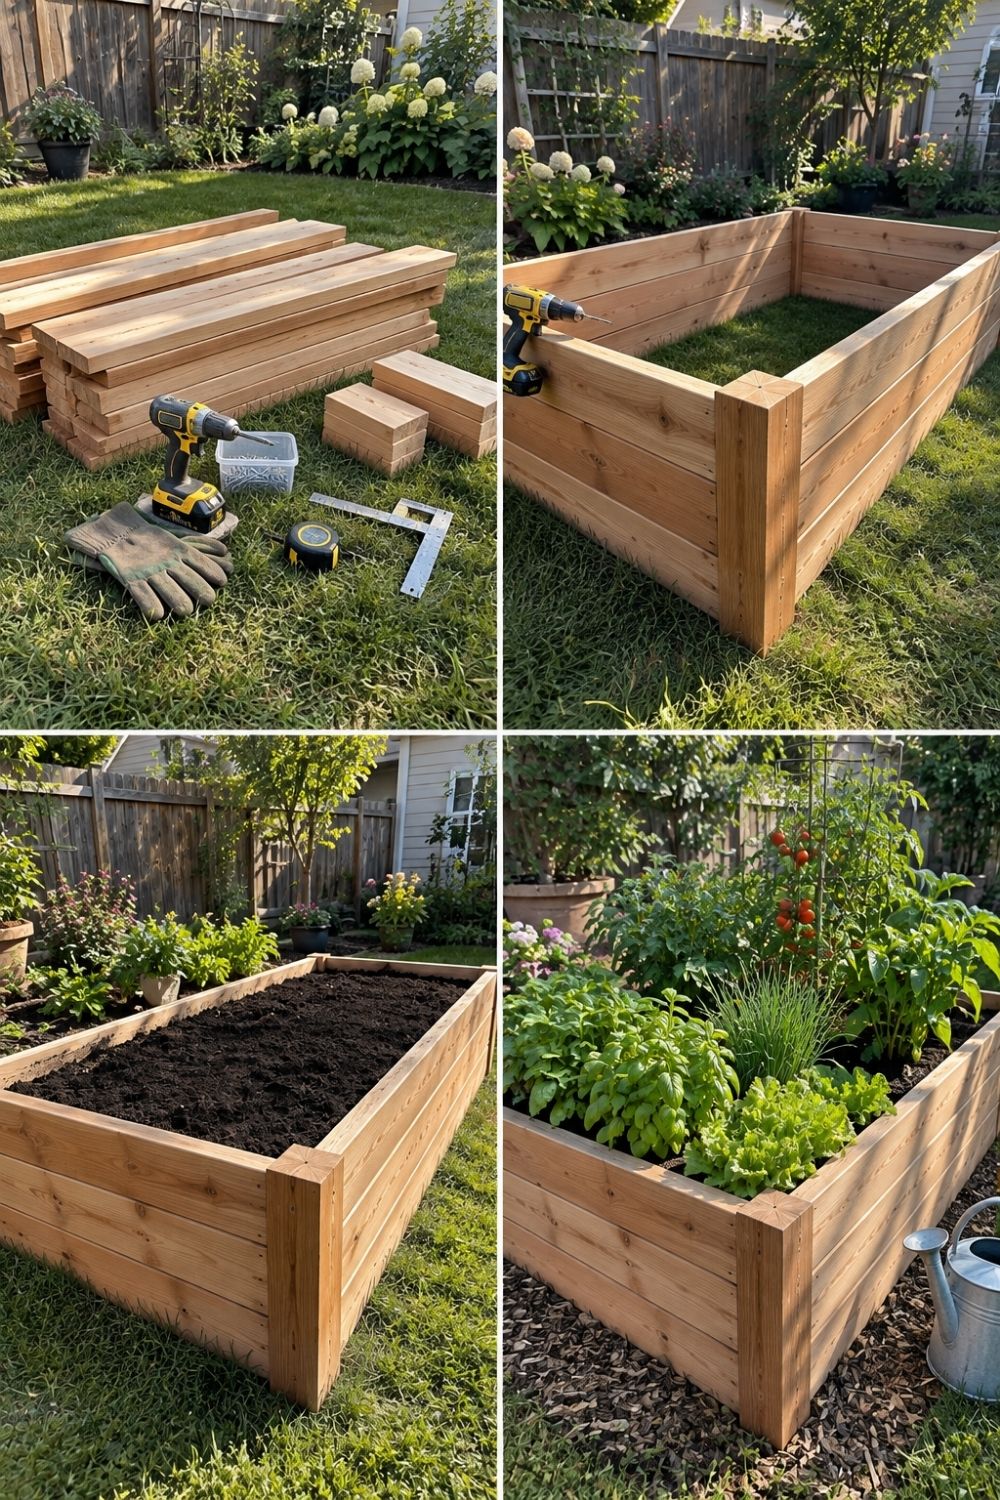
Photo by SassyGarden
The four photos above follow the whole build: a stack of boards, a drill, gloves and a square on the lawn; the frame screwed together at the corners; the finished bed filled with dark soil; and finally the same bed packed with vegetables, herbs and flowers a couple of months later. Use corner posts made from 2 by 2 or 4 by 4 lumber on the inside of the frame, and screw every board into them; beds full of wet soil push their sides outward harder than you’d expect.
Material decides both the look and how long the raised bed lasts:
| Material | Lifespan (roughly) | Good to know |
|---|---|---|
| Cedar or redwood | 10–20 years | Naturally rot resistant, the classic choice, pricier |
| Larch or Douglas fir | 5–10 years | Cheaper, still fairly durable untreated |
| Pine, untreated | 3–5 years | Cheapest; line the inside to slow rot |
| Galvanized steel | 20+ years | Heats up in full sun; great for tall beds |
| Stone, brick or blocks | Decades | Permanent, heavy, more work to build |
Avoid old railroad ties and wood treated before 2004 with CCA (chromated copper arsenate). Current pressure-treated lumber uses different preservatives and is generally considered acceptable for food gardens, but if it worries you, cedar or steel sidesteps the question.
Size matters more than material. Keep raised beds no wider than 4 feet if you can reach from both sides, or about 3 feet if one side is against a fence. Length is up to you; 8 feet is common because it uses standard boards. Height depends on what you’re growing and who’s gardening:
| Height | Best for |
|---|---|
| 6–8 inches | Over decent soil; salads, herbs, onions |
| 10–12 inches | Most vegetables, over poor or heavy soil |
| 18–24 inches | Root crops over hard ground, less bending |
| 24–30 inches | Working from a chair or stool, accessibility |
Leave paths at least 18 inches wide between beds, and closer to 24 inches if you’ll be pushing a wheelbarrow through. My first raised garden beds had 12-inch paths, and I regretted it every time I tried to kneel between them.
Filling it without going broke
Soil is where raised beds get expensive. A tall bed filled entirely with bagged mix can cost more than the frame itself. The fix is to fill it in layers.
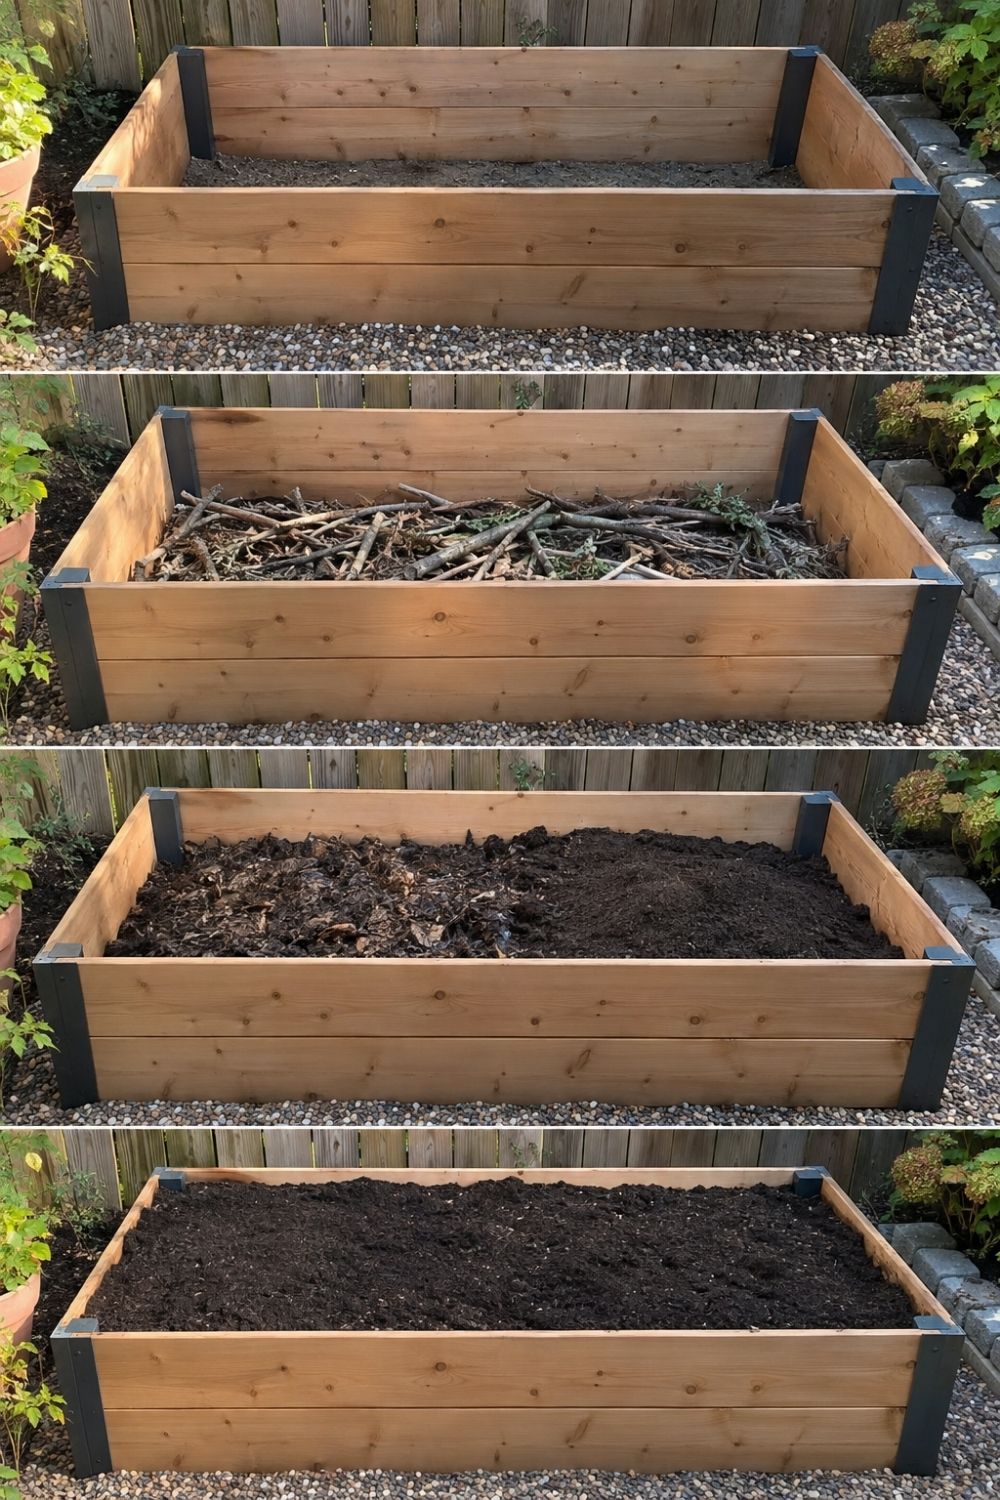
Photo by SassyGarden
The four stages above show an empty bed on gravel, then a layer of branches and twigs in the bottom, then a thick layer of compost, and finally a level top layer of dark planting mix. This layered approach, loosely based on hugelkultur, works well for deeper beds:
- Lay cardboard on the bottom (with tape and labels removed) to smother grass and weeds. It rots away within a season.
- Add bulky wood like logs, branches and twigs to fill the bottom third of a deep bed. They break down slowly and hold moisture.
- Add a layer of rough organic matter: leaves, grass clippings, half-finished compost, old potting mix.
- Finish with 8–12 inches of good growing mix where the roots will actually live. A blend of roughly 60% topsoil and 40% compost is a simple, reliable recipe.
- Water each layer as you go, so the bed settles evenly.
Expect the soil level to drop by several inches over the first year as the lower layers break down. That’s normal; top it up with compost each spring. For a closer look at soil blends, Homestead and Chill’s guide to filling raised garden beds walks through their own mix in detail.
One thing I’d skip: filling a raised bed with pure bagged potting mix. It’s light and fluffy at first, then shrinks, dries out fast and runs out of nutrients within a season.
Tall beds for less bending
A tall raised garden bed turns gardening into something you can do standing up, which matters more every year for a lot of gardeners.
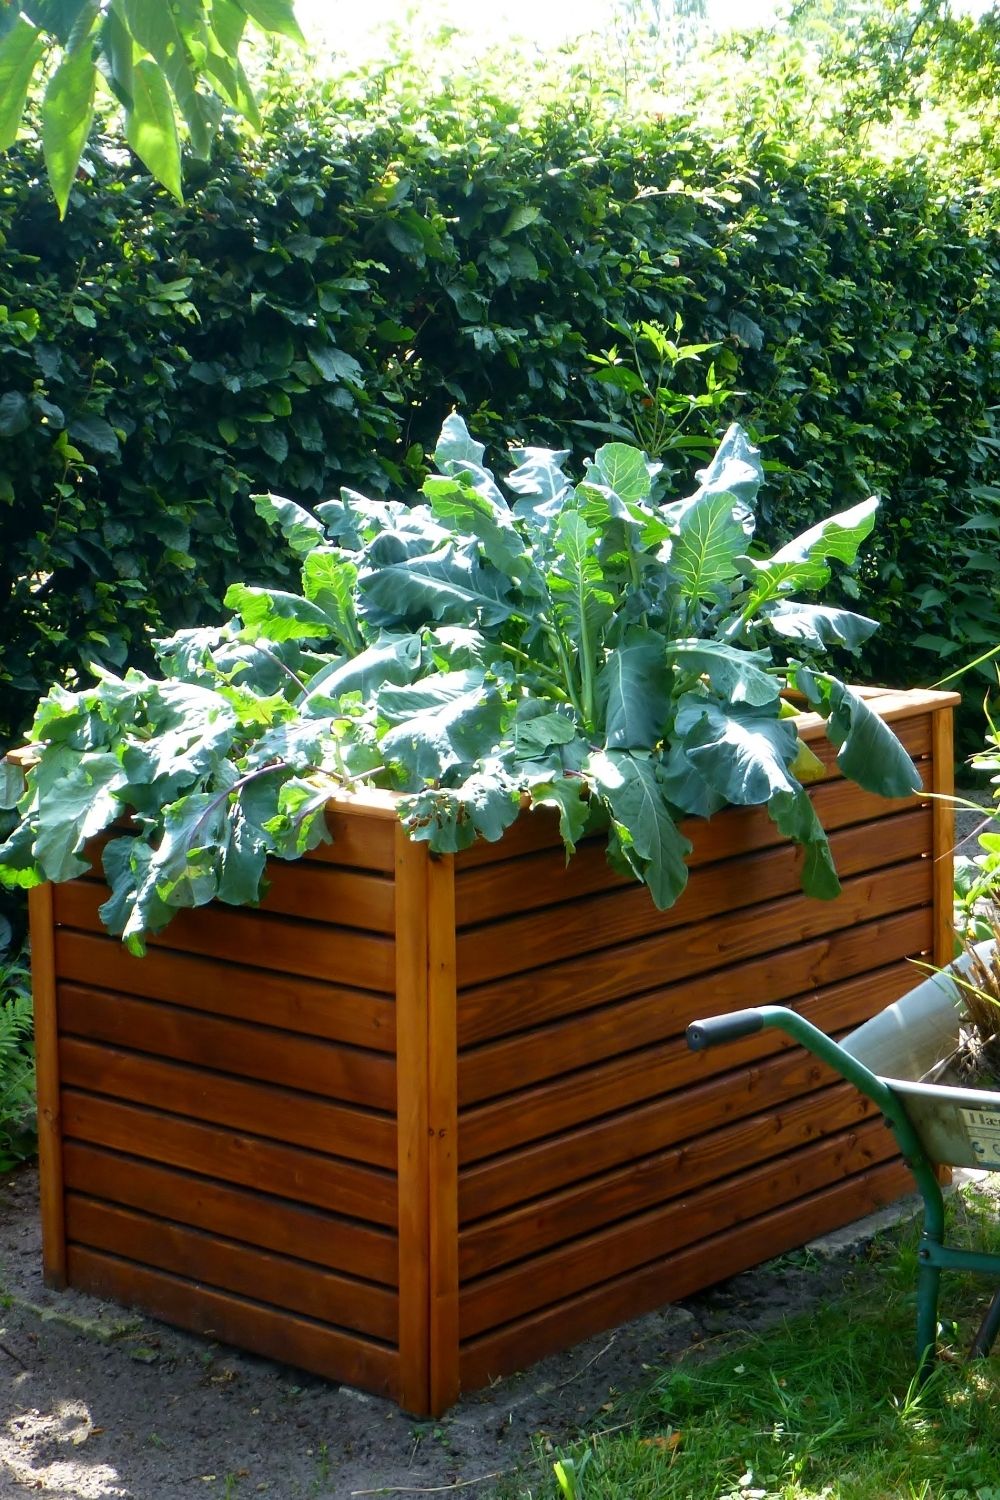
Image by Ulrike Mai from Pixabay
This waist-high wooden bed, with horizontal slats stained a warm brown, overflows with big blue-green brassica leaves, with a wheelbarrow waiting beside it. At this height, the bed is also out of reach of most slugs and rabbits, which is a bonus nobody mentions. Tall beds need strong corners and often internal cross braces to keep the sides from bowing, and they dry out faster than low ones, so plan on drip irrigation from the start.
Watering: drip lines are worth the hour
Raised beds drain well, which is the point, but it also means they need water more often than open ground. Hand watering works for one small bed. Beyond that, a drip line saves hours every summer.
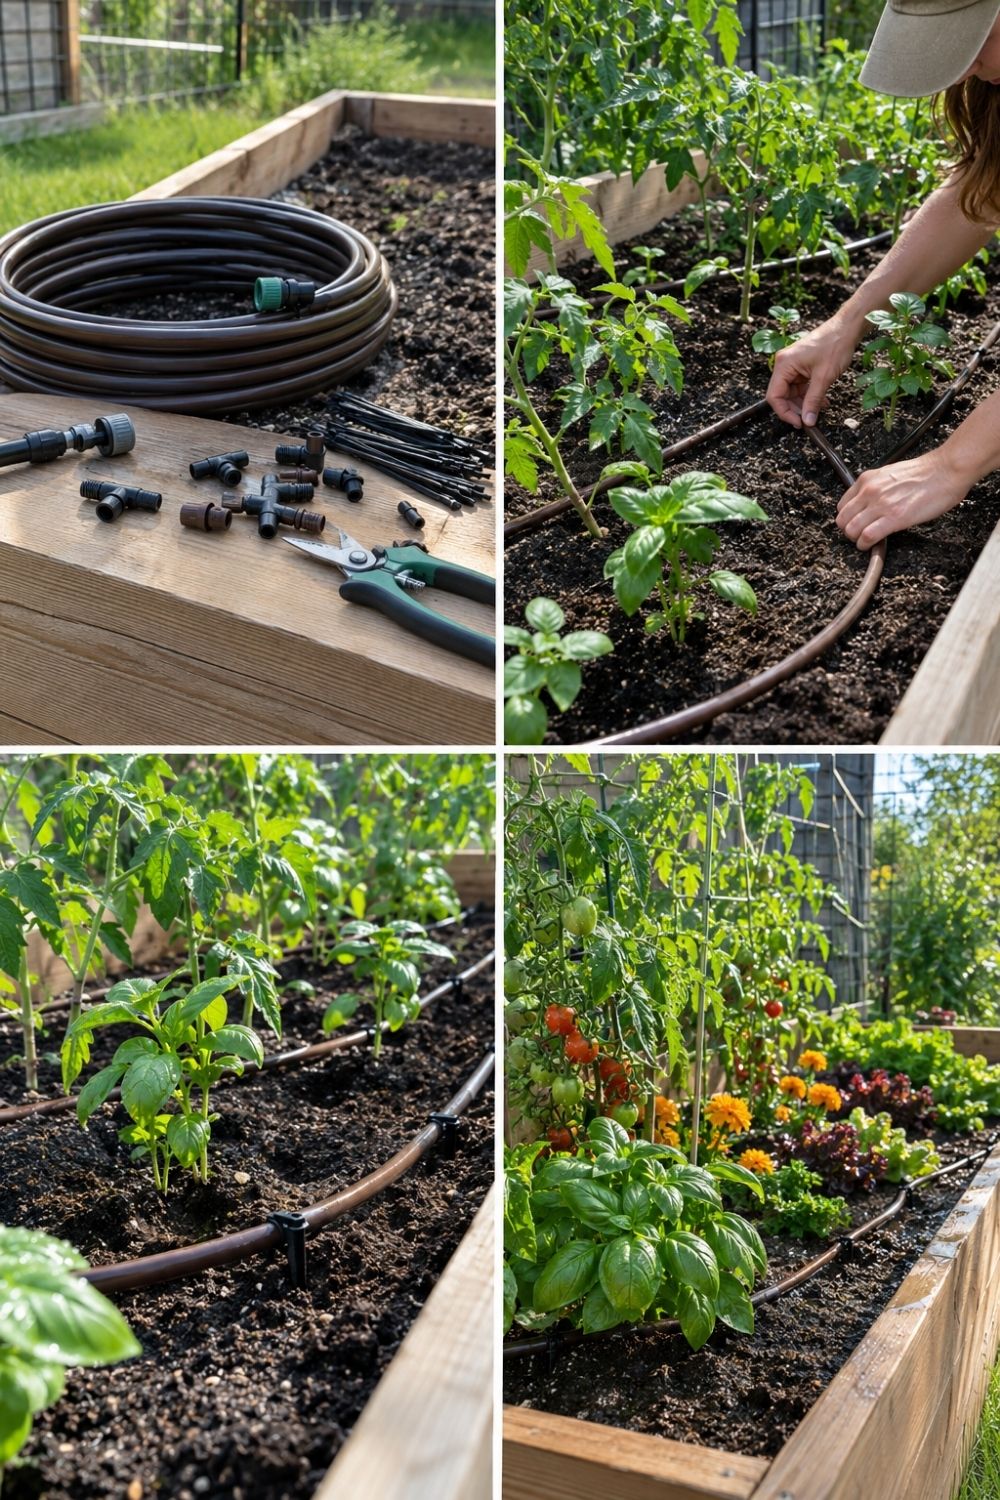
Photo by SassyGarden
The four photos above show the parts laid out on the edge of a bed (a coil of drip tubing, connectors and a pair of pruners), then the tubing being threaded between young tomato plants, and finally the finished bed with the line running along each row of tomatoes, basil and marigolds. Run the drip line along each row or in loops about 12 inches apart, connect it to a simple timer at the tap, and cover it with a thin layer of mulch to cut evaporation. Water deeply two or three times a week rather than a little every day, so the roots grow down instead of staying near the surface.
The first summer I set up a drip line, I went away for ten days in July and came back to a bed that looked better than when I left. That was the moment I stopped thinking of irrigation as optional.
Add a trellis and use the height
The space above a raised bed is as useful as the soil in it. A trellis at the north end turns one bed into two layers of growing space.
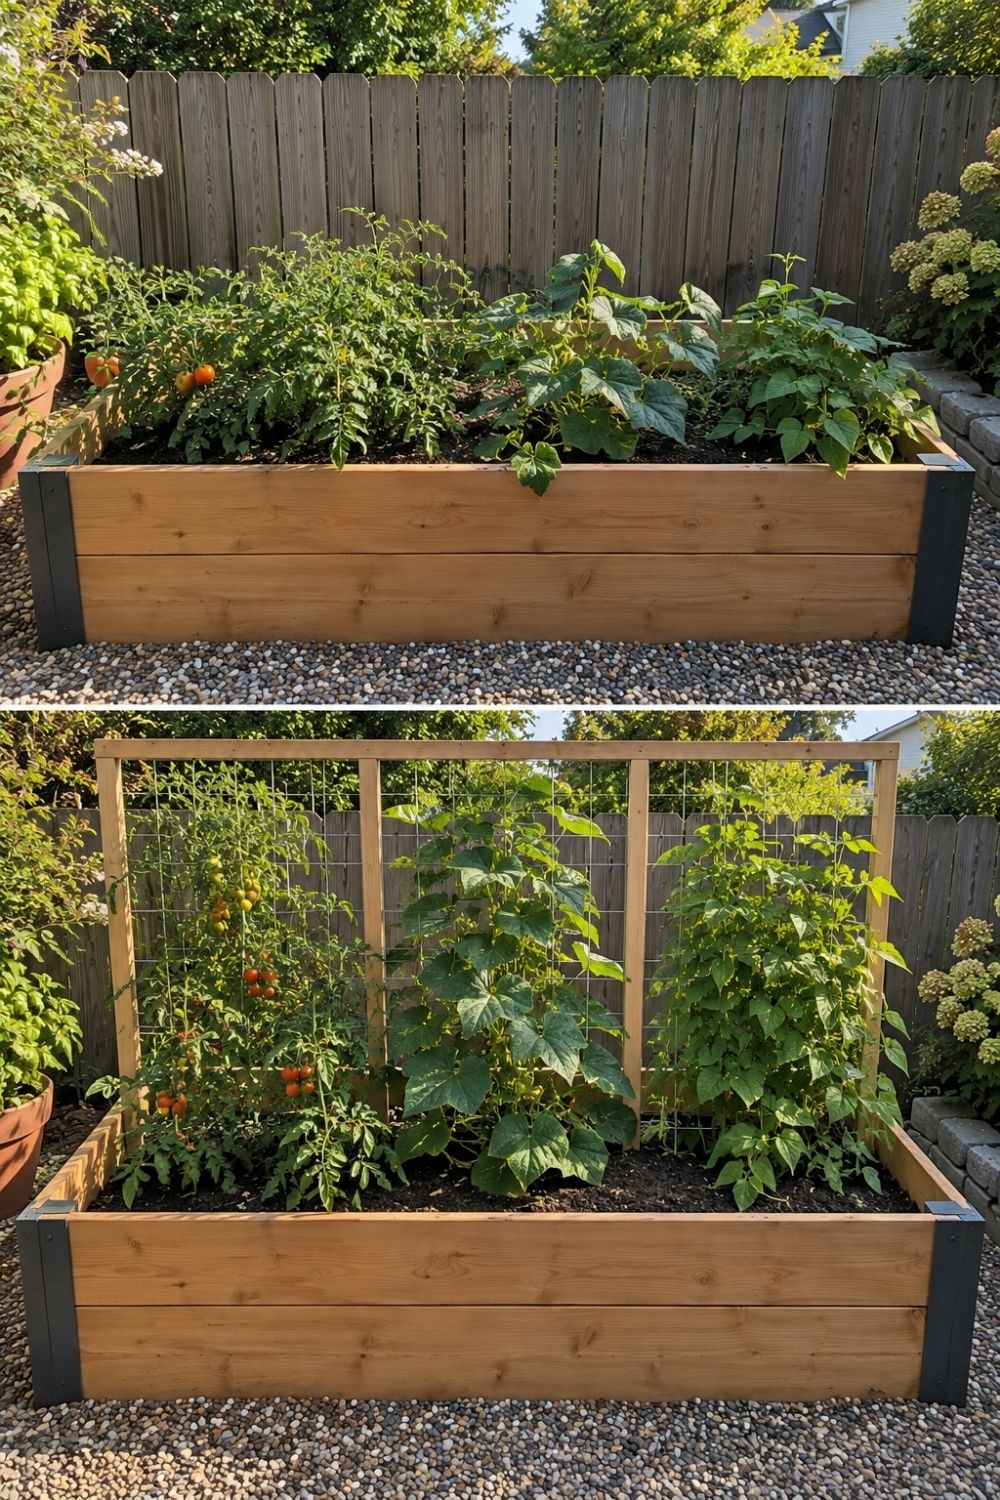
Photo by SassyGarden
The before and after above shows the same bed twice: first with tomatoes, peppers and squash sprawling over the edges, then with a simple wooden frame and wire trellis along the back, cucumbers and tomatoes climbing it, and the rest of the bed suddenly clear. Put trellises on the north side so they don’t shade the rest of the bed, and fix the posts to the inside of the frame or drive them into the ground below it. For more designs, from A-frames to arches between two beds, see my post on garden trellis ideas.
Covers extend the season and keep pests out
A raised garden bed is easy to cover, which is one of its most underrated advantages. The frame gives you something solid to fix hoops, netting or a lid to.
Photo by Matt Baker on Unsplash
In this garden, a low tunnel of clear plastic on blue hoops covers one raised bed, while an onion flower head stands tall in the bed in front. A cover like this warms the soil in early spring, protects seedlings from a late frost and can add several weeks to each end of the season. In summer, swap the plastic for fine mesh to keep out cabbage white butterflies and flea beetles.
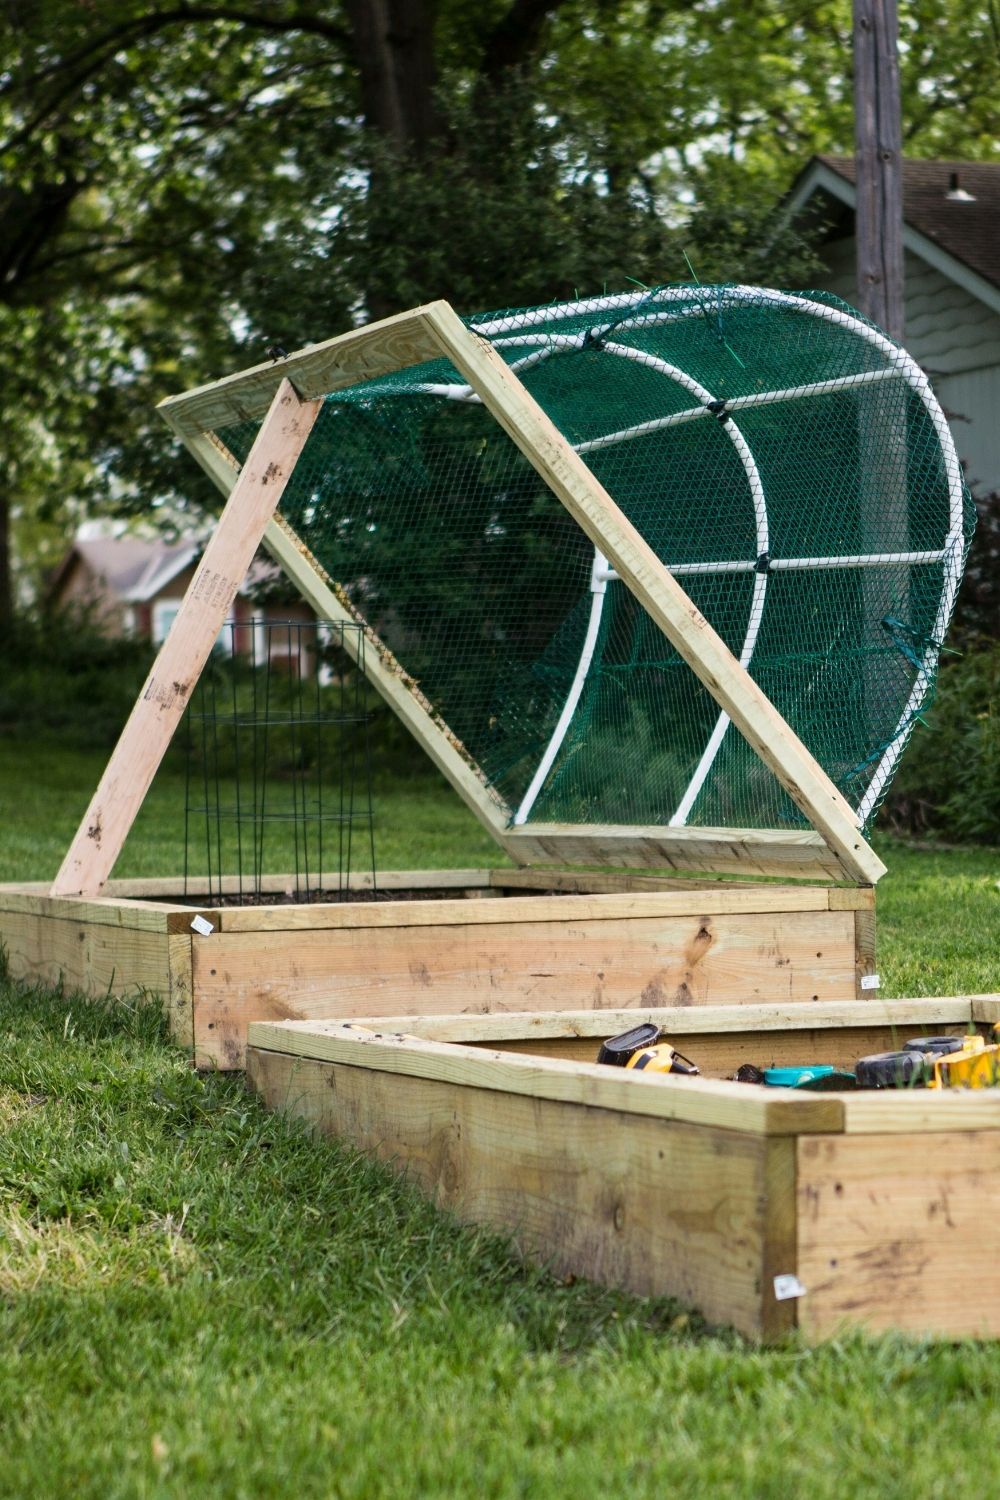
Photo by Isaac Smith on Unsplash
This one takes a different approach: two long wooden beds on a lawn, one with a hinged lid made from a timber frame and curved hoops covered in green netting, propped open for planting. A lid like this keeps birds off berries and seedlings, lifts up in seconds, and can be swapped from netting to clear plastic as the seasons change. It’s a clever build if squirrels or pigeons treat your garden as a buffet.
What to plant first
A new raised bed rewards quick, reliable crops that show results in weeks, not months. For a first season in a 4 by 8-foot bed, I’d plant:
- Salads and radishes at the front edge, sown every two or three weeks for a steady supply.
- Two or three tomato plants along the back or trellis side.
- Bush beans or peas in the middle, which also add nitrogen to the soil.
- Basil, parsley and chives tucked in between.
- A few marigolds or nasturtiums at the corners to bring in pollinators.
Grow densely: raised beds don’t need the wide rows of a traditional vegetable plot, so spacing plants by the square foot works well. If you want help deciding what goes where across the whole garden, my post on garden planting ideas covers sun, shade and plant pairings, and my kitchen garden ideas show how raised beds fit into a larger edible garden. If you’re still sketching the overall layout, start with planning a garden that feels designed.
Would I build them again?
Every time. Raised garden beds aren’t magic, and they won’t rescue a spot with too little sun or a gardener who forgets to water. But they give you good soil from day one, a head start in spring, fewer weeds and a garden you can reach without wrecking your knees. Build them no wider than you can reach, fill them in layers, run a drip line before summer, and put a trellis on the north side. That’s the setup I keep coming back to, and I suspect you will too.