
A yard feels designed when every part of it has a job and the parts are connected: a path that leads somewhere, a place to sit that faces something worth looking at, plants that repeat instead of competing. Size has very little to do with it. You can plan a garden on a tiny urban lot or a half-acre yard with the same handful of decisions, made in the right order. Most unfinished-looking yards come from doing them backward: plants first, garden layout later. The order below works for a front yard, a backyard or both, and ends with a garden plan you can build in stages.
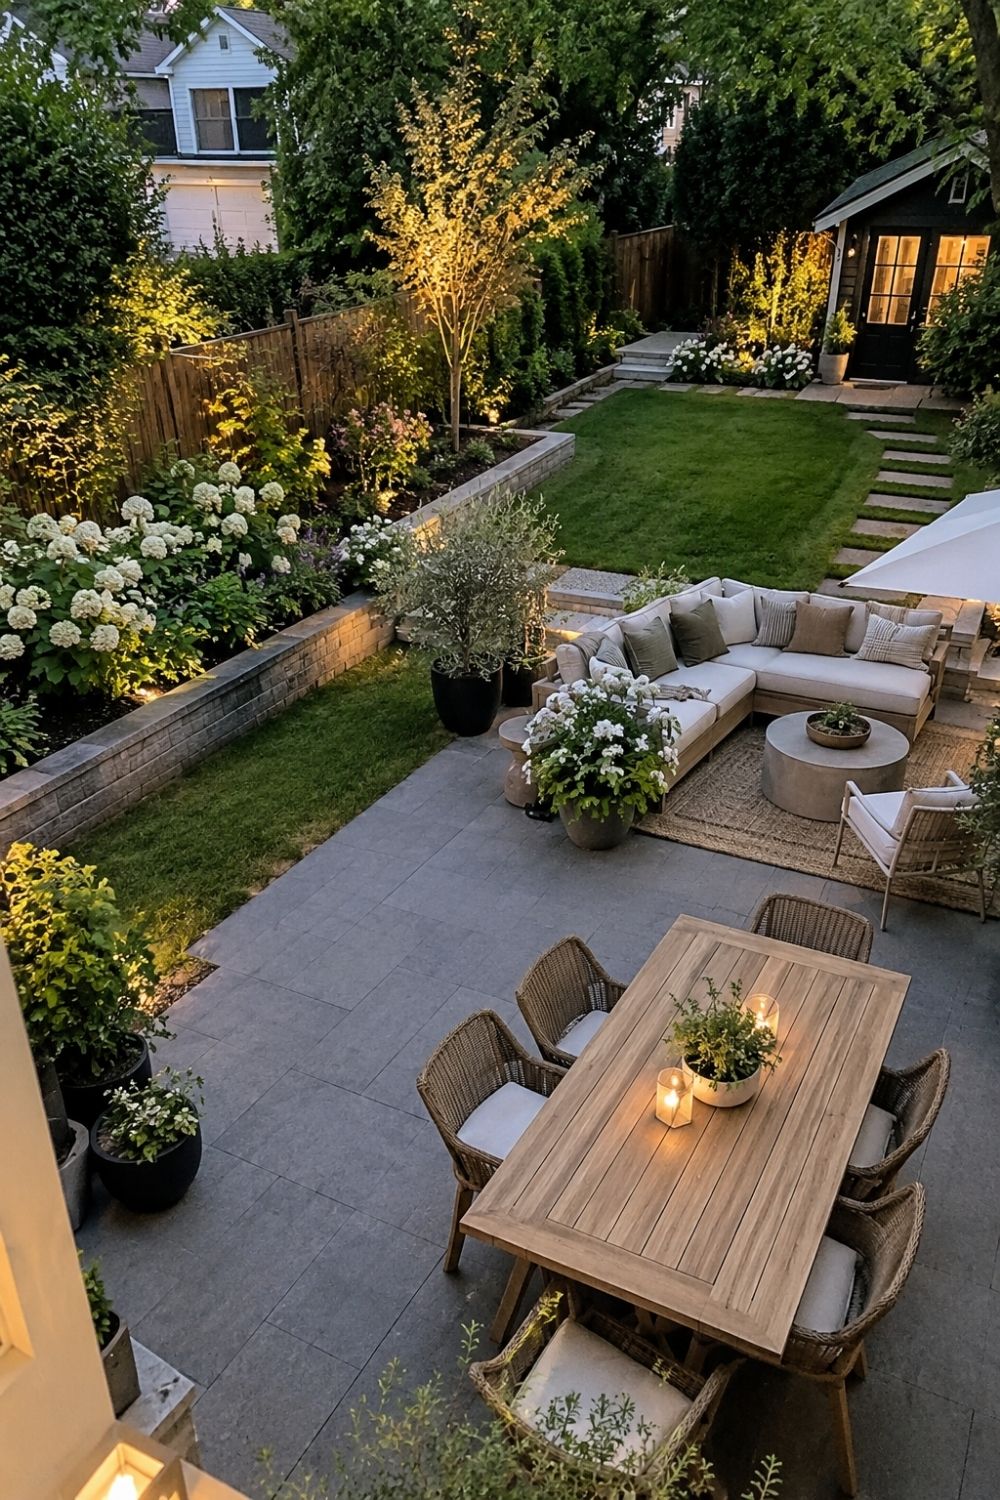
Photo by SassyGarden
Start with what the yard already gives you
Every garden design begins with a site inventory, which is a fancy name for a list of what’s already there. Draw the house, property lines, driveway, trees, fences, faucets and the spot where the trash cans live. Grid paper helps, and so does a pencil, because you’ll erase a lot. This base map is the first page of your garden plan.
Then map the light: check the yard in the morning, at noon and in the late afternoon, and shade in the areas that stay dark. Plant tags use four light categories, and each means a specific number of hours:
| Plant tag says | Direct sun per day | What usually works there |
|---|---|---|
| Full sun | 6 hours or more | Vegetables, most flowering perennials, lawn |
| Part sun | 4–6 hours | Many perennials and shrubs, herbs |
| Part shade | 2–4 hours | Ferns, hostas, woodland plants, seating |
| Shade | Less than 2 hours | Groundcovers, foliage plants, paths and patios |
Orientation changes all of this, so it has its own guide: what to check before planting a north-, south-, east- or west-facing garden.
A few more things belong on the map:
- Water: where puddles sit after rain and where downspouts empty.
- Slopes and views: where water runs, and which neighbor’s window you’d rather not face.
- Buried lines: in the US, call 811 a few working days before you dig. Utility companies mark gas, water and cable lines for free.
Give every part of the yard a job
A lawn with a border around the edge and a table dropped in the middle has no structure, so the eye has nowhere to land. The fix is zoning: deciding what each area is for before deciding what it looks like. Designers usually split a property into three kinds of space:
- Public: what people see from the street, mostly the front yard.
- Private: where you spend time: dining, lounging, playing, growing food.
- Service: trash, compost, the hose reel, a shed. It needs access but not attention.
On a copy of your site map, draw loose bubbles for each use: dining near the kitchen door, lounging where the evening shade falls, vegetables in the sunniest corner. Make three or four versions of this rough garden layout and compare them. One will usually put the grill 40 feet from the kitchen.
The backyard in the photo above holds three rooms: a lounge, a dining table and a raised lawn with a shed. None is big. They feel generous because each is set apart by a change in level, a planted edge or a different surface.
A quick test for any garden layout: stand at the back door and ask where you’d walk first. If the honest answer is “nowhere in particular,” the zones need a stronger reason to exist. Sounds harsh, right? Still, it saves you from building a patio nobody sits on.
Front yard or backyard: the plan changes a little
The steps are the same for both, but the goals differ. A front yard garden plan is mostly seen from the street and the driveway, so it works like a frame for the house. Keep it simple: a clear route to the door, one or two focal points, and planting that looks tidy twelve months a year, because this is the part everyone sees in January too. Plantings that echo the house help: a white-trimmed house with white flowers, or a brick house with warm foliage. Leave the fussy seasonal displays for pots by the steps, where they’re easy to swap.
The backyard is for living, so plan the garden around what you do there: eating, reading, grilling, kids, dogs, vegetables. Comfort beats curb appeal here. Shade over the seating, a surface that doesn’t get muddy, a spot for the grill that doesn’t smoke out the table. If you only have the budget for one yard this year, I’d start with the one you spend time in.
Draw the paths before you choose a single plant
Paths are the skeleton of a garden plan. They connect the zones and set the lines everything else follows, and it’s easier to fit a shrub to a path than to reroute a path around a shrub.
In garden design, path width matters more than material. A main walkway, like the one from the sidewalk to the front door, should be at least 4 feet wide so two people can walk side by side. A secondary path to a shed or a bench can shrink to 2–3 feet. Anything narrower than 18 inches reads as a stepping-stone trail rather than a walk.
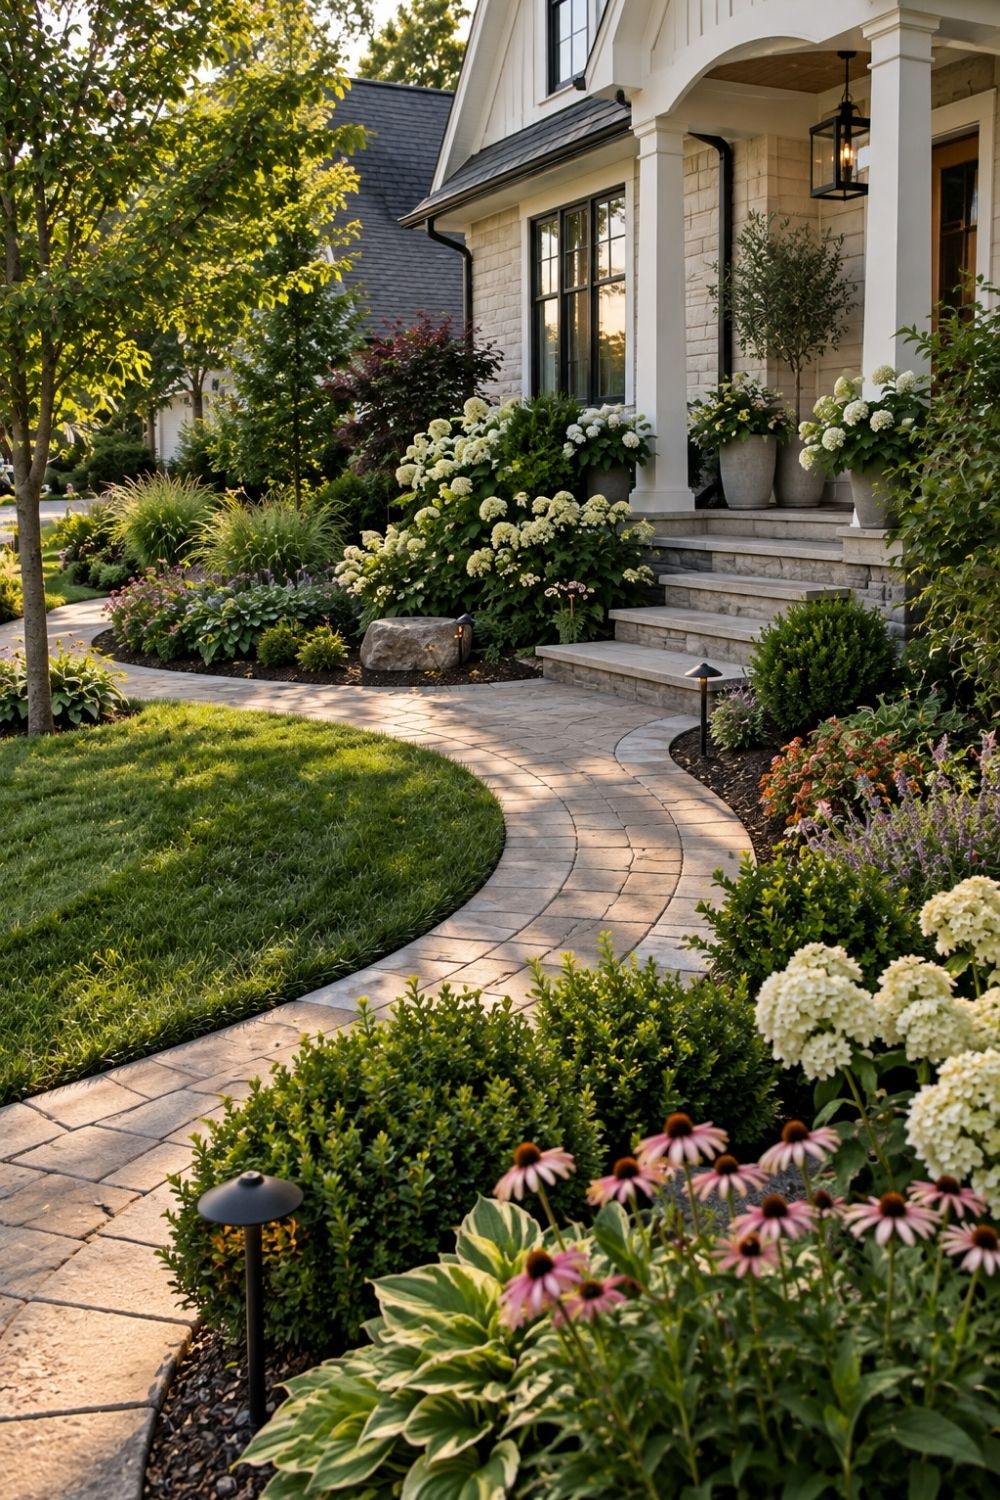
Photo by SassyGarden
A straight path feels formal and suits short distances. A curve slows people down and makes a front yard garden design feel less like a runway to the door. In the front yard above, planting fills the inside of the curve, so the path has a reason to bend. A curve with nothing inside it looks arbitrary. Materials and edging get their own post: what makes a garden path look good.
Small and narrow yards need a destination
Long, skinny backyards read like hallways, and planting evenly along both fences makes it worse. A narrow garden design works better as a sequence of rooms with a reason to walk to the far end.
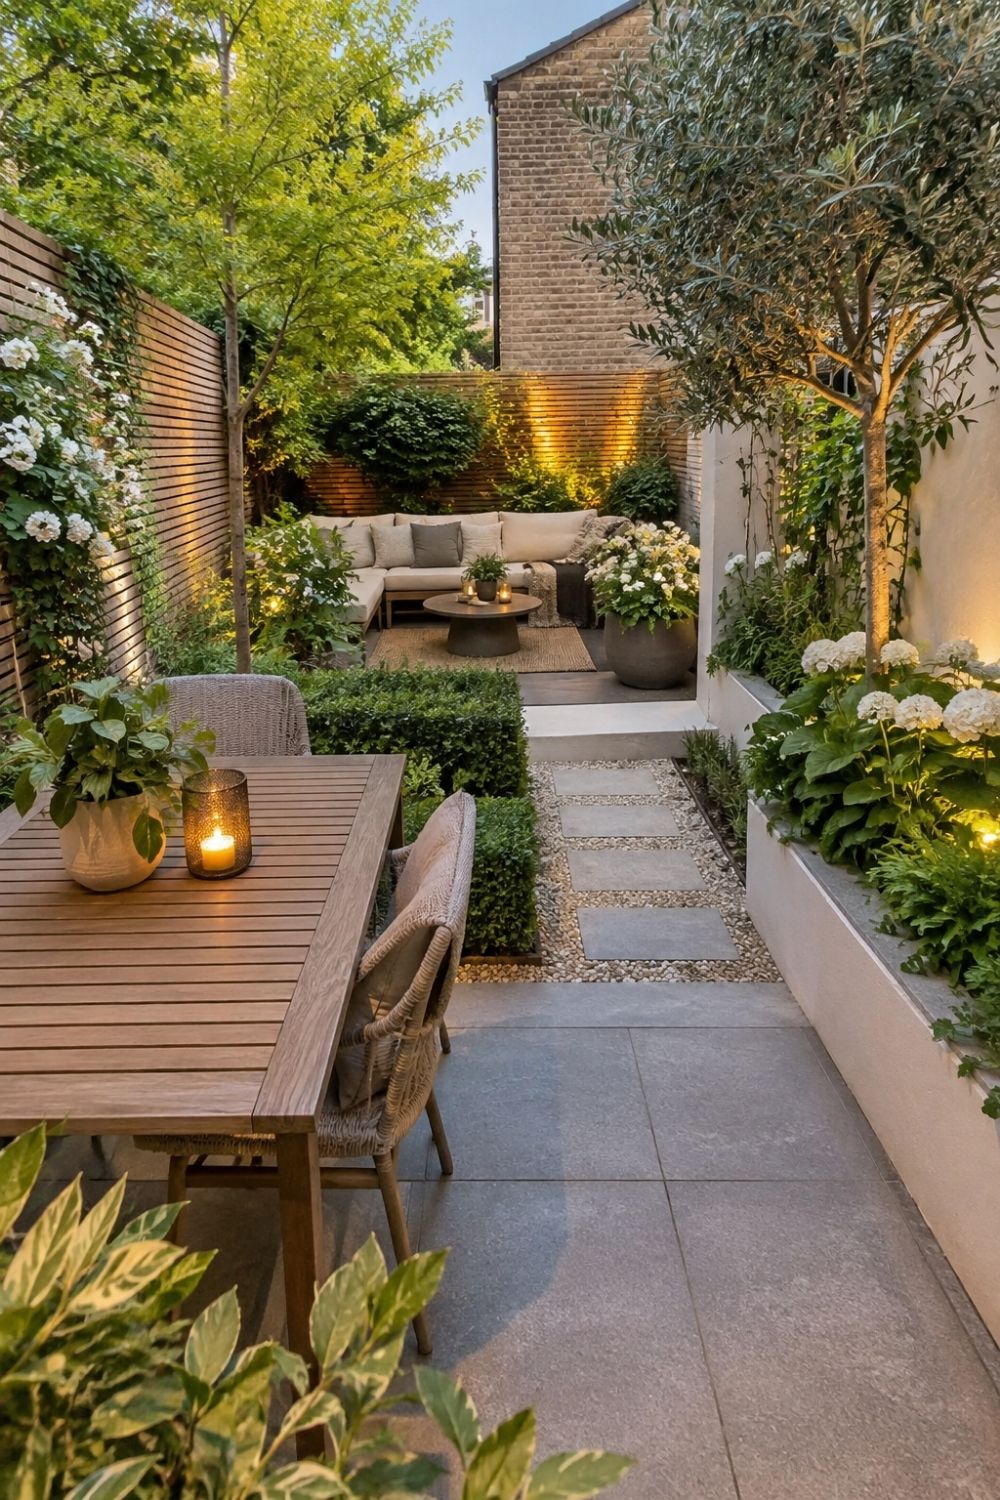
Photo by SassyGarden
In the yard above, a dining table sits near the house, a stepping-stone path runs down one side, and a lounge corner waits at the end under a small tree. Low hedges and raised planters mark where one room ends. The yard is no wider, yet it takes longer to “read,” so it feels bigger. Small garden ideas that follow the same logic:
- Offset the path so the planting gets a deeper bed on one side.
- Put the seating at the far end, so you use the whole yard.
- Limit materials to two or three. Five kinds of paving in a tiny yard looks like a sample board.
Plant in layers, then repeat yourself
Once the garden layout is fixed, planting fills the spaces between them. Layers make a border look full without looking messy:
- Trees and large shrubs for structure and shade. One small tree does more than a dozen perennials.
- Medium shrubs, ideally some evergreens, to hold the shape of a bed in winter.
- Perennials and grasses for seasonal color and movement.
- Groundcovers so weeds have less bare soil.
Leave room for mature size: a shrub labeled “4 feet wide” will get there, usually faster than expected.
Repetition is the other half of a good garden plan. Use each plant in groups of three or five, then repeat the group elsewhere. A border with 30 different plants, one of each, looks like a plant sale; six plants repeated in drifts look planned. Two or three colors plus green is plenty, and white or silver foliage ties everything together at dusk. Of course, this isn’t magic: a repeated plant still has to like its spot, which brings us back to the light map.
Match plants to the light you mapped, and check the hardiness zone on every tag. Most of the US falls between zones 3 and 9, and a plant rated for zone 7 won’t survive a zone 4 winter. Specific combinations are in my post on garden planting ideas.
Less lawn, less weekend work
Lawn is the default filler in most yards and the most work per square foot. Keep grass where kids and dogs actually play; when you plan your garden, the rest can often be something else.

Photo by Rebecca Intan on Pexels
This courtyard dropped the lawn entirely: gravel, potted plants along a white wall, a few young trees and one yellow bench. It suits shady corners where grass thins out anyway. Gravel needs a compacted base or fabric underneath, and crushed angular gravel stays put better than pea gravel. Another cheap option is widening the beds by a couple of feet each spring, so the lawn shrinks without a single weekend lost to it. Groundcovers such as creeping thyme (Thymus serpyllum) handle light foot traffic between stepping stones; check that any groundcover isn’t invasive in your region first. Whatever lawn stays should be a clear shape with a crisp edge; grass that’s simply left over between beds looks accidental.
Add structure: shade, privacy and a place to sit
A yard without anything vertical feels exposed. A pergola, fence panel, hedge or arbor gives the seating area walls and a ceiling, and blocks the views you’d rather not see.
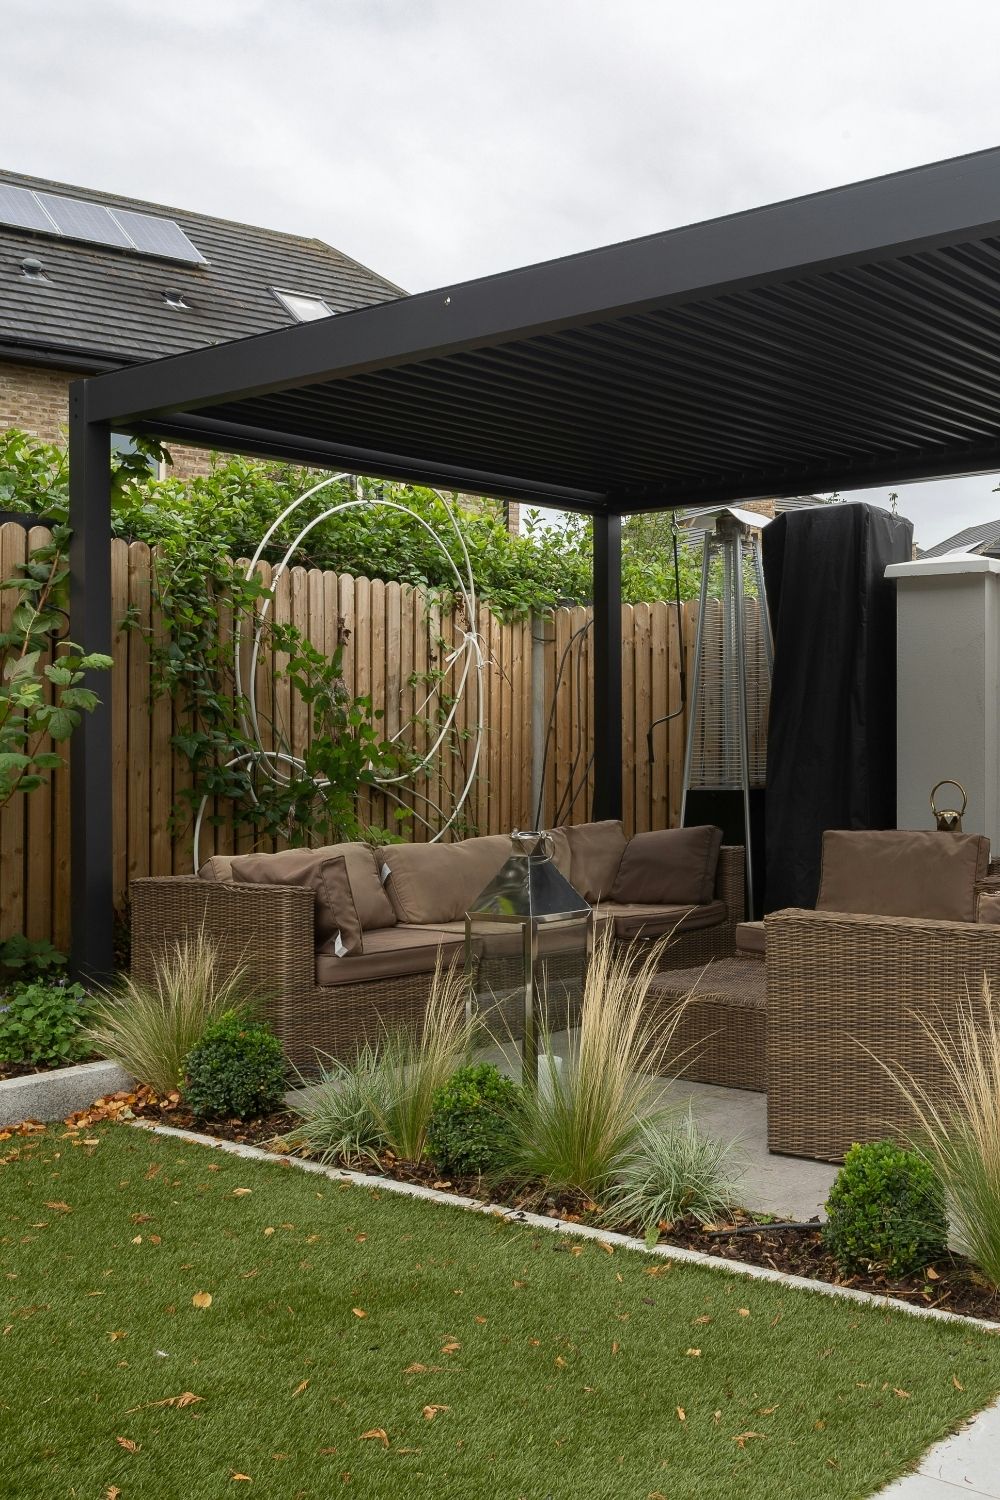
Photo by Tile Merchant Ireland on Unsplash
The black louvered pergola in this small backyard turns a patio into an outdoor room, with grasses softening the posts. The same idea works in any style, from a wooden pergola with roses to a simple frame with shade sails. Plan privacy from the seat, not the property line: one screen or tall planter often blocks a window better than a whole fence. More options are in my list of garden screening ideas. And measure the furniture before building a patio: a table for four needs about 10 by 10 feet.
Light the garden for the hours you actually use it
Most people use a backyard garden after work, which in spring and fall means after dark. Lighting belongs in the garden plan from the start, so cables or solar spots go in before the plants.
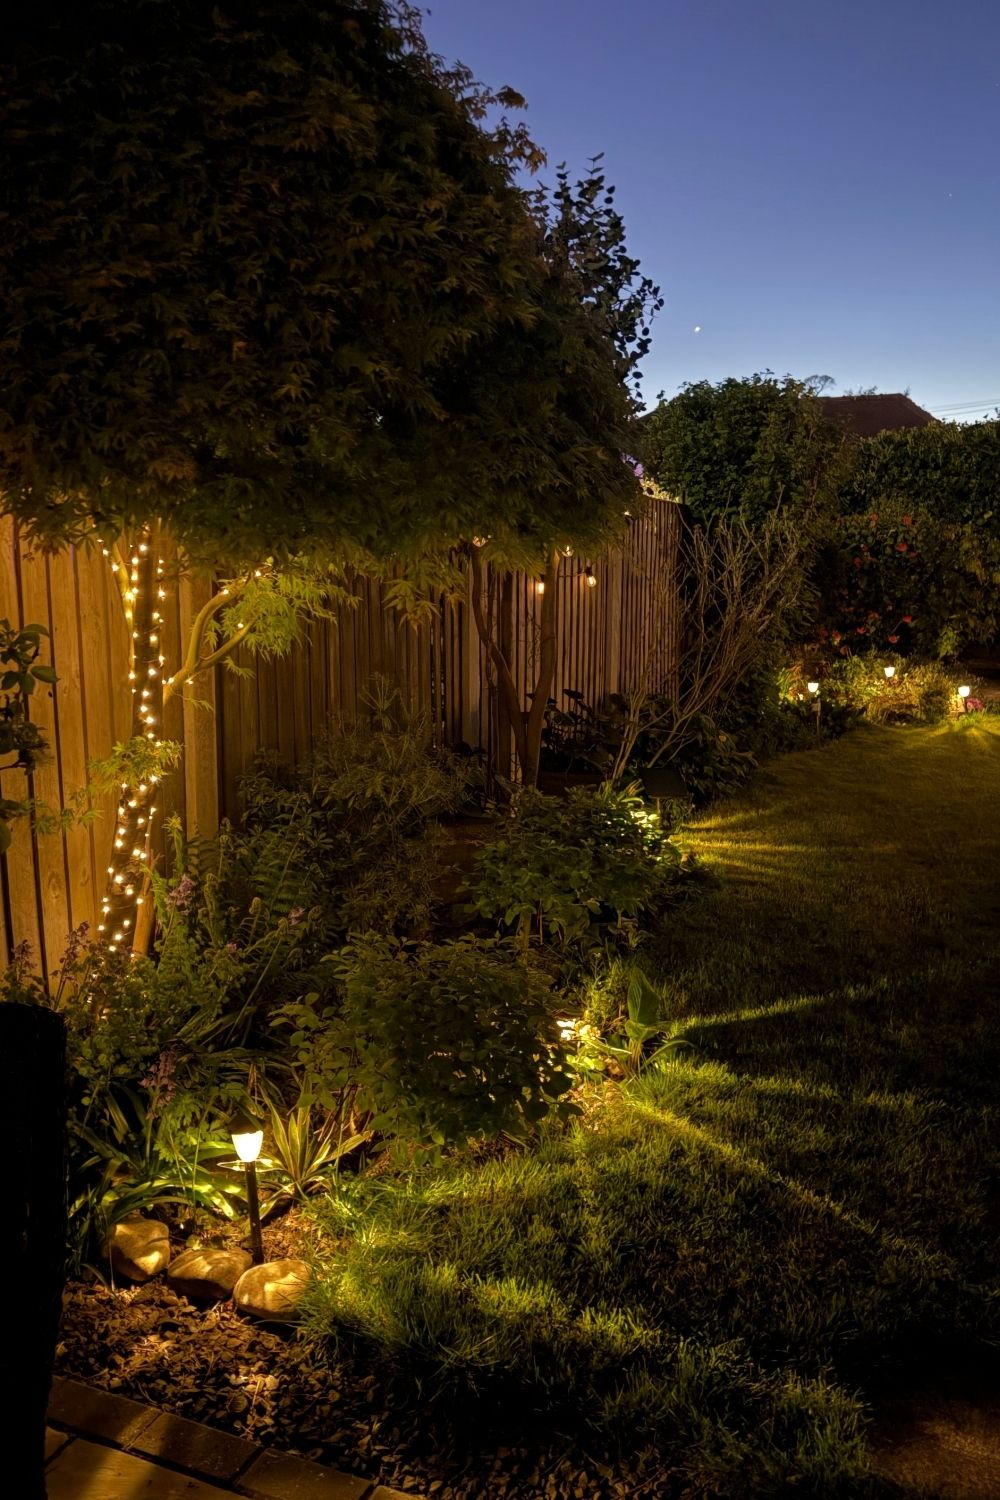
Photo by David Pickup | Advertising & Marketing on Pexels
Think in three layers:
- Path lights along walks and steps.
- Accent lights aimed up into a tree, which gives the yard a focal point at night.
- Ambient light at the seating area: string lights or lanterns.
The garden above wraps a tree trunk in fairy lights and keeps the rest low, with nothing shining down from a pole. Warm white, around 2700K, flatters plants far more than cool white. Solar fixtures skip the wiring, though they need a spot that gets sun during the day, and a cheap one tends to give up after a couple of seasons. Easy mistake to make: lighting every single plant. Pick three or four things worth seeing at night and leave the rest dark.
Plan for water: too much and too little
Water is cheaper to plan for than to fix. For too much of it, grade soil away from the house so it drops about 6 inches over the first 10 feet, and send downspouts away from the foundation. A low spot that never dries can become a rain garden or a dry creek bed. Water near the foundation or in the basement is a job for a professional; the options are in my post on fixing backyard drainage problems.
For too little water, group plants by thirst when you plan the garden: thirsty ones near the faucet, tough ones where the hose never reaches. A drip line on a timer waters roots instead of paths.

Photo by David Brown on Pexels
The front yard above swapped lawn for gravel mulch, mounding shrubs, grasses and aloes, a water-wise garden design that stays green on little irrigation. Aloe (Aloe vera) only lives outdoors year-round in roughly zone 9 and up; colder yards get the same look from hardy sedums, yuccas and grasses. Aloe is also toxic to cats and dogs if chewed.
Before and after: build it in phases
A finished garden plan is a lot of work, but nobody has to build it in one season. Phasing spreads the budget and lets you live with each stage first.
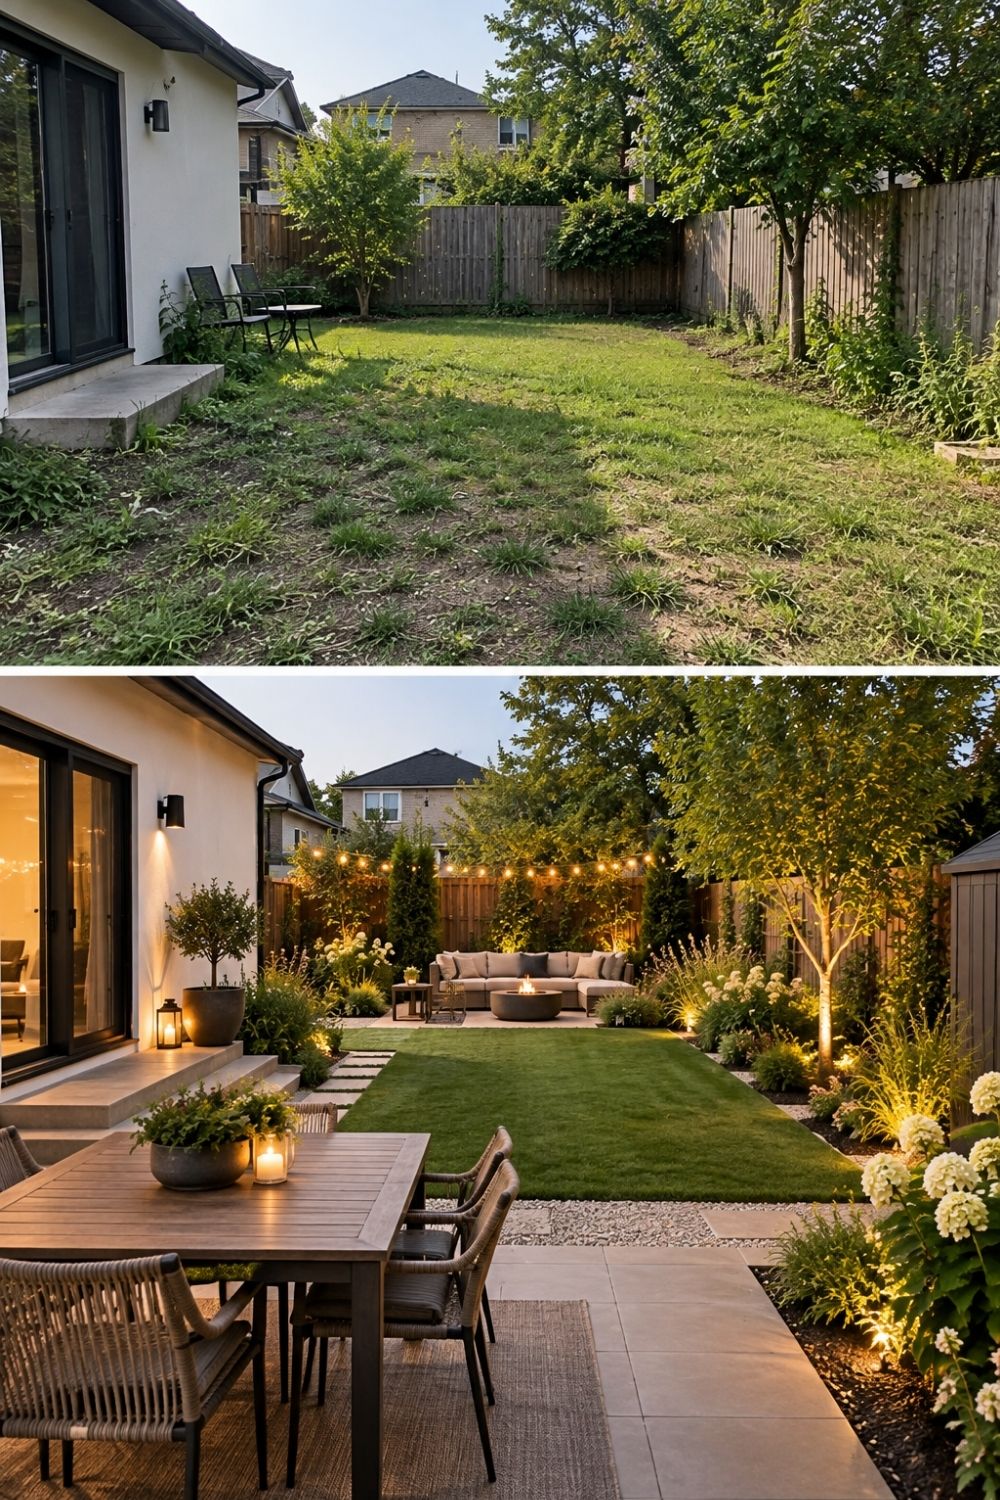
Photo by SassyGarden
The before and after above shows how far structure goes: a patchy lawn becomes a patio, a crisp lawn panel, planted borders and string lights. Most of the change comes from hard lines and lighting, not rare plants. A sensible order for planning your garden in stages:
- Year one: drainage, grading, paths, patio and structures, the heavy jobs that would wreck new plants.
- Fall of year one: trees and large shrubs, finished about six weeks before the ground freezes in your zone.
- Year two: perennials, grasses and groundcovers.
- Year three on: lighting, containers and edits. Move what isn’t thriving and repeat what is.
Keep the paper garden plan and update it as you go. It’s the easiest way to remember where the bulbs are, and why that shrub ended up exactly there.
That’s the whole garden plan: map the light, zone the space, draw the paths, then plant in repeated layers. A yard feels designed when every part of it has a reason to be there.