
Brick does something few other materials manage: it looks at home next to a 1920s bungalow, a new-build farmhouse and a city courtyard alike. It’s small enough to follow a curve, heavy enough to stay put, and cheap enough that a weekend of brick edging won’t wreck the budget. The ideas below go from the simplest lawn edge to full paths and raised beds, with the base and brick type each one needs so it still looks straight in five years. If you’re still working out where paths and beds should go in the first place, my guide to planning a garden that feels designed is the step before this one.
1. A soldier-course edge between lawn and bed
A soldier course is a single row of bricks set on end, standing upright like a line of soldiers. It’s the classic brick border between a lawn and a planting bed, and it stops grass from creeping into the soil far better than a spade-cut edge.
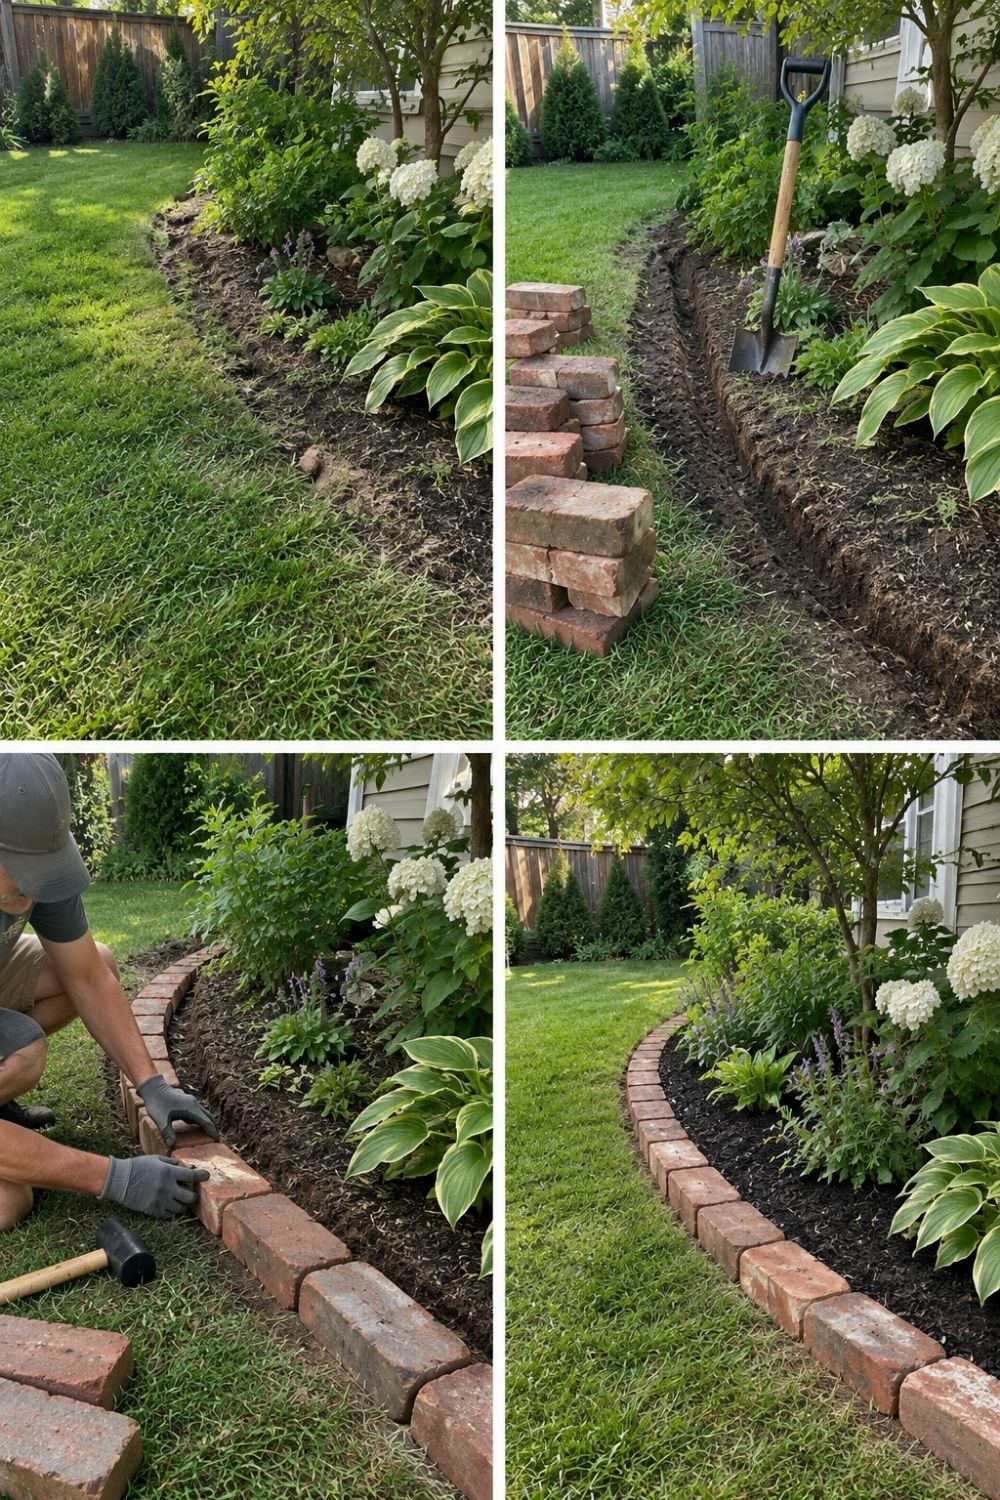
Photo by SassyGarden
The four steps in the photo show the whole job: mark the curve, dig a narrow trench, set the bricks on a thin layer of sand, and tap each one level with a rubber mallet. Dig the trench deep enough that about two thirds of each brick sits below ground, so the edge doesn’t lean outward once the soil settles. A garden hose laid on the lawn is the easiest way to try out curves before you dig.
2. A raised double-row border around an island bed
Two rows of bricks laid flat, one on top of the other, give an island bed a low wall about 4–5 inches high. It keeps mulch and soil inside the bed, lifts the planting a little, and gives the whole bed a clear outline from across the yard.
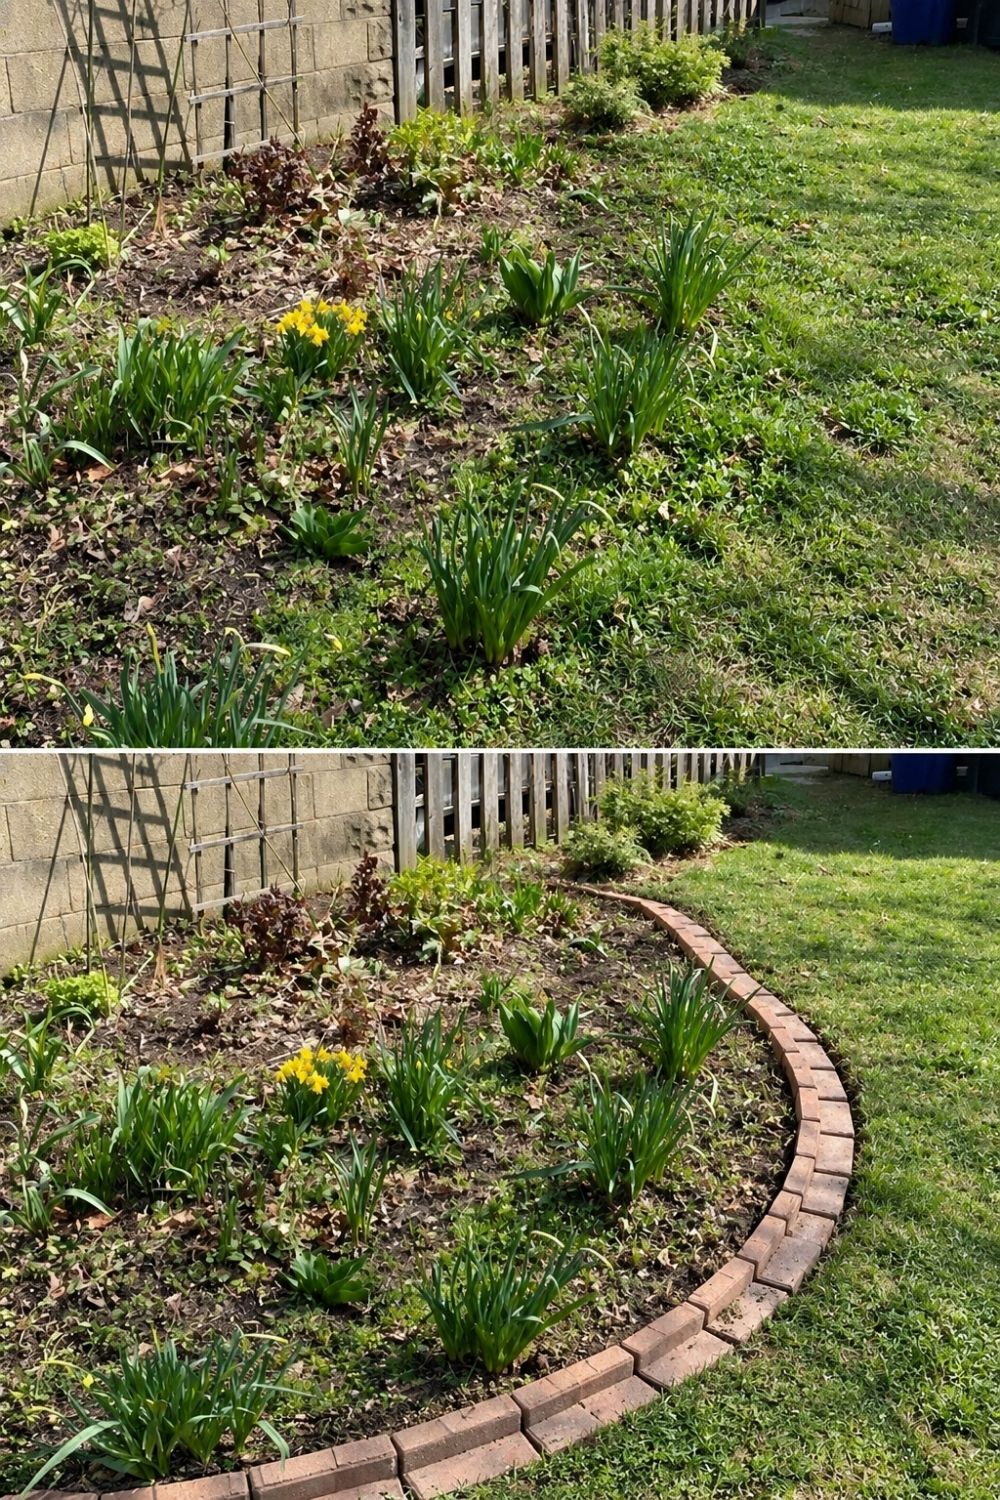
Photo by SassyGarden
The before and after above is a good reminder of how much edging alone changes. The planting is the same in both photos; the only difference is the brick border, and the bed goes from “patch of lawn with bulbs in it” to something that looks planned. On a curve, keep the bricks tight at the inside of the bend and let the gaps open slightly on the outside, then brush sand or soil into the gaps.
3. A curved running-bond path
Running bond is the simplest brick pattern: each row offset by half a brick, like a wall laid on its side. It’s forgiving on curves and quick to lay, which makes it a good first brick path.
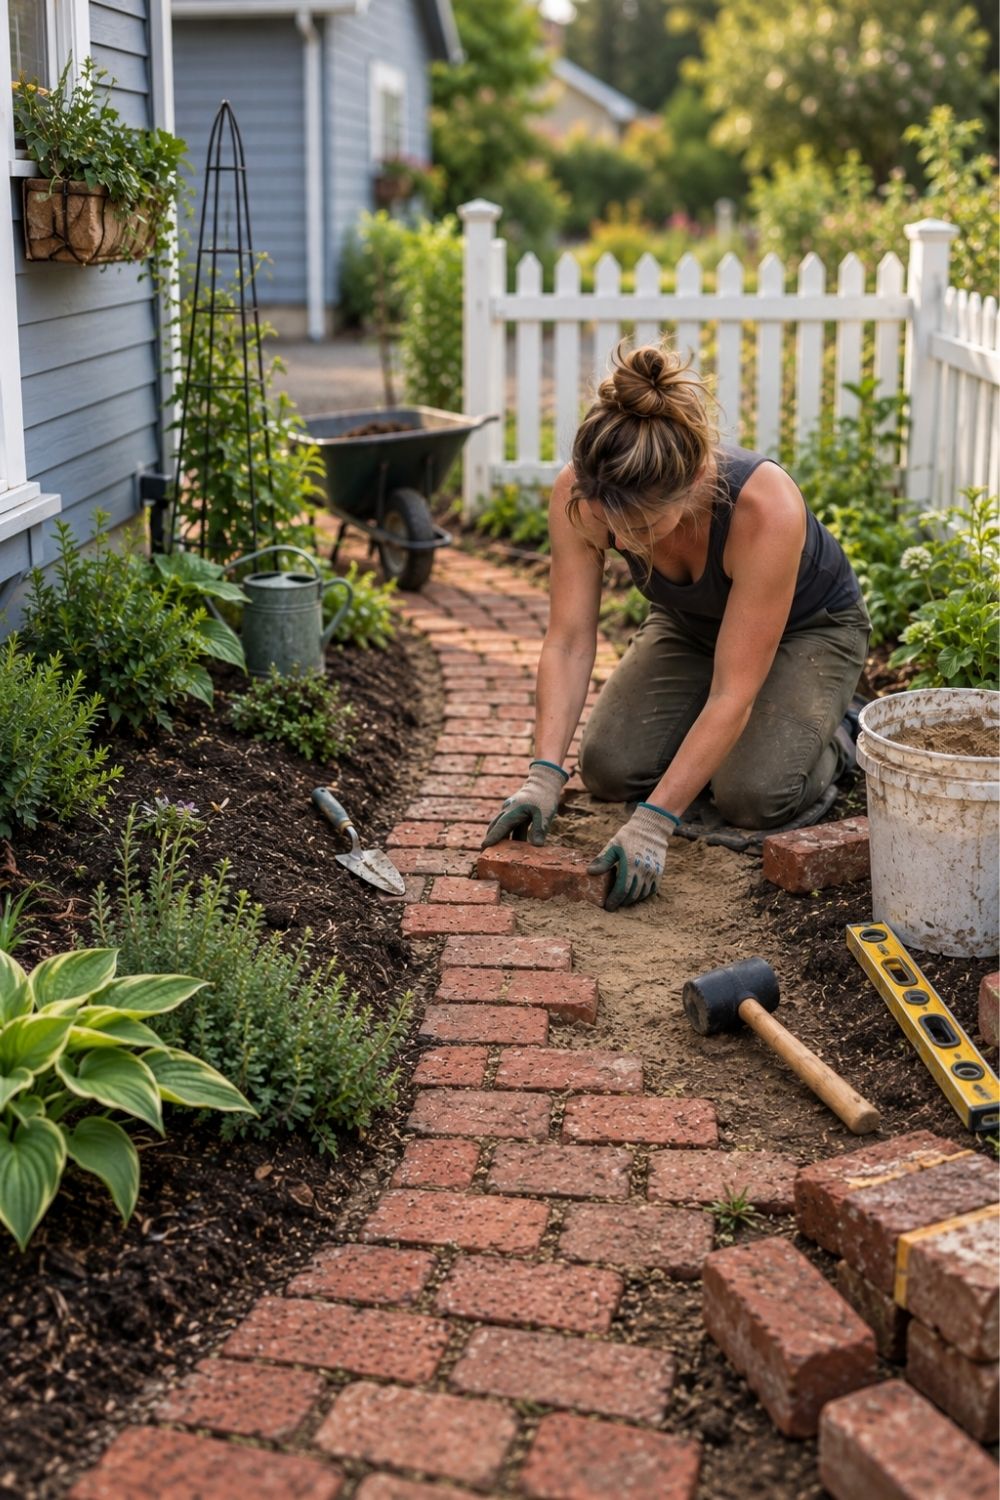
Photo by SassyGarden
The part nobody sees decides whether a brick path stays flat or turns into a wobbly mess after two winters. The Oregon State University Extension recommends:
- 4–6 inches of compacted gravel base, more on soft clay soil.
- About 1 inch of bedding sand on top, screeded smooth.
- A slope of about 1 inch for every 4 feet, so water runs off instead of sitting on the bricks.
- An edge restraint along both sides, whether plastic, metal, concrete or a soldier course of brick.
In the photo, the path is being laid on sand with a level and a rubber mallet close at hand, and hostas already planted along the edge. Before you dig this deep, call 811 so buried utility lines get marked.
4. Gravel path with brick edging
This is the budget version of a brick path, and one of my favorite brick landscaping ideas because it gets most of the look for a fraction of the bricks. Gravel fills the middle, and a single row of brick on each side holds it in place.
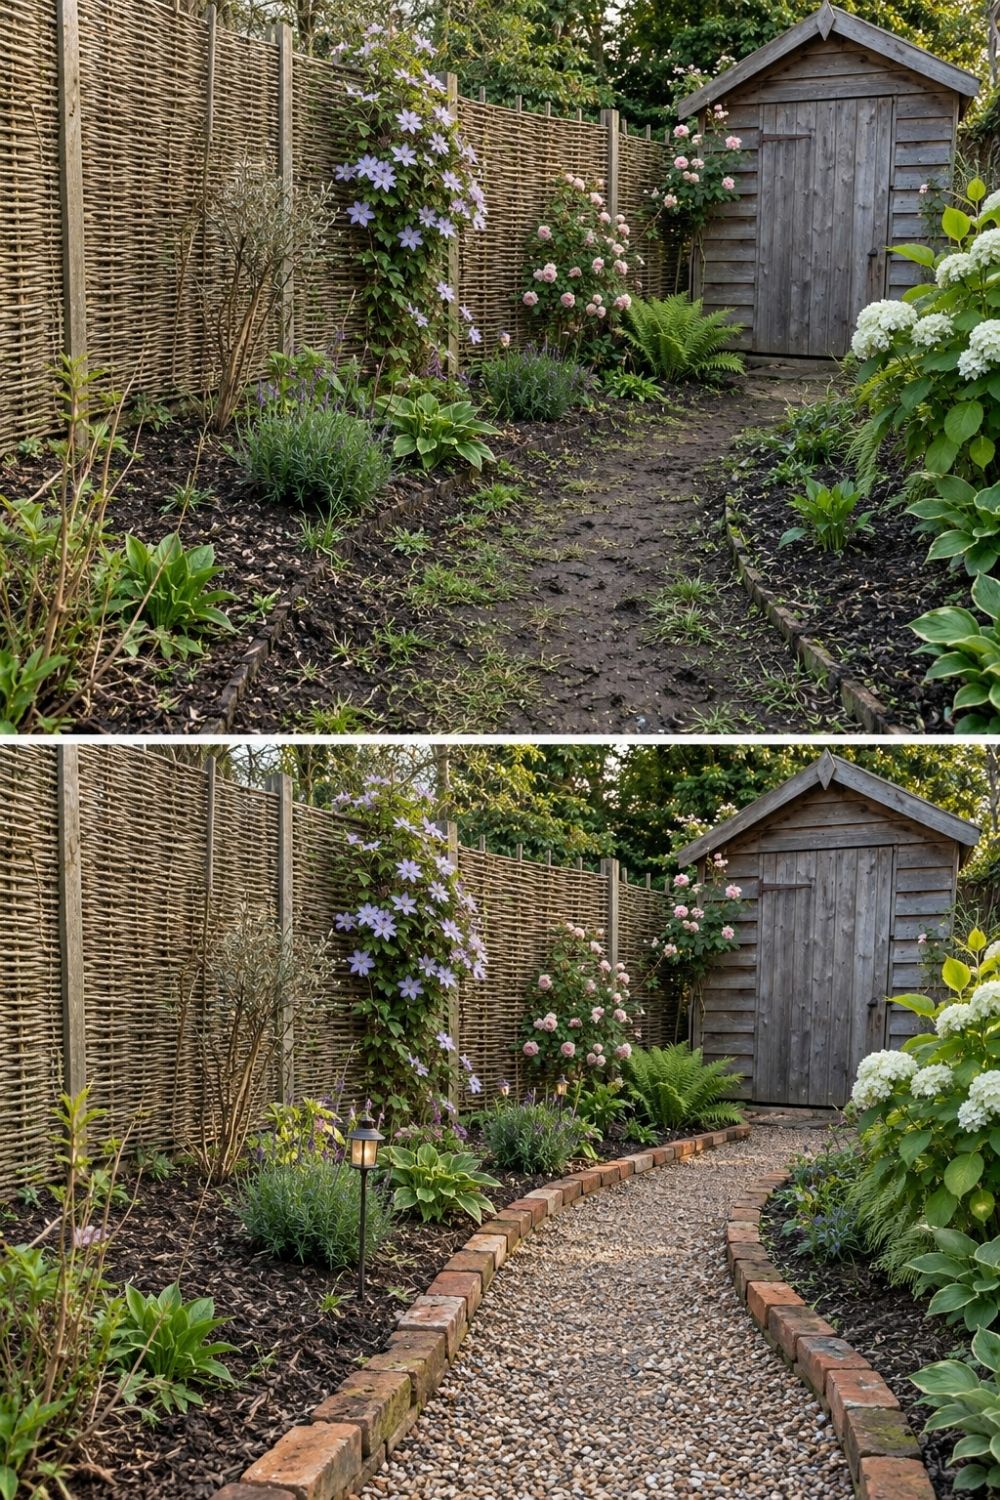
Photo by SassyGarden
In this garden, a worn dirt track to a shed turns into a gravel path with brick edging, a few low lights and planting along both sides. The edging does most of the work: without it, gravel drifts into the beds and soil washes onto the path within a season. Lay landscape fabric under the gravel to slow weeds, and pick crushed angular gravel rather than pea gravel if the path gets daily use, because it locks together and doesn’t roll underfoot. For more on materials and path widths, see what makes a garden path look good.
5. A herringbone brick path to the front door
Herringbone is the zigzag pattern, with bricks set at 45 or 90 degrees to each other. It’s the strongest of the common brick patterns because every brick locks against its neighbors, which is why it’s often used for driveways too.
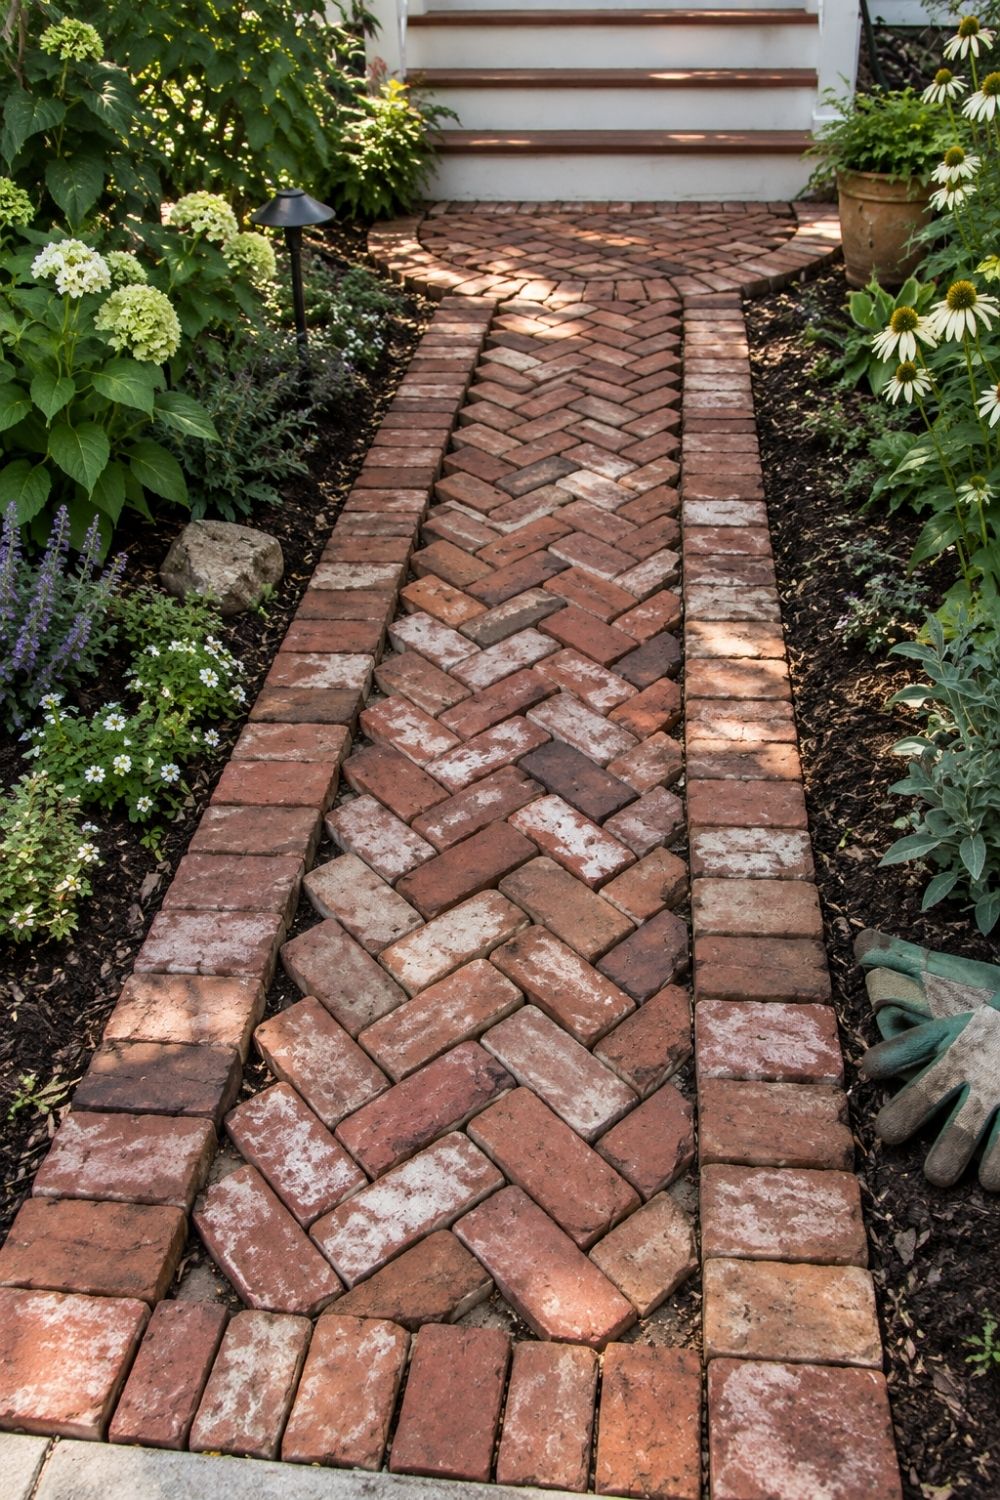
Photo by SassyGarden
This front path frames a herringbone middle with a straight border of bricks along each side, leading to white steps between hydrangeas and coneflowers. The border has a job too: herringbone needs a firm edge, and it hides the cut ends of the angled bricks. Expect a lot of cutting along the sides, so this is a job for a brick saw or a rented wet saw rather than a chisel. Always wear eye protection and a dust mask when cutting brick.
6. Brick raised beds and a round planter
Brick raised beds last far longer than timber ones, and a round brick planter in the center turns a vegetable patch into a proper red brick garden.
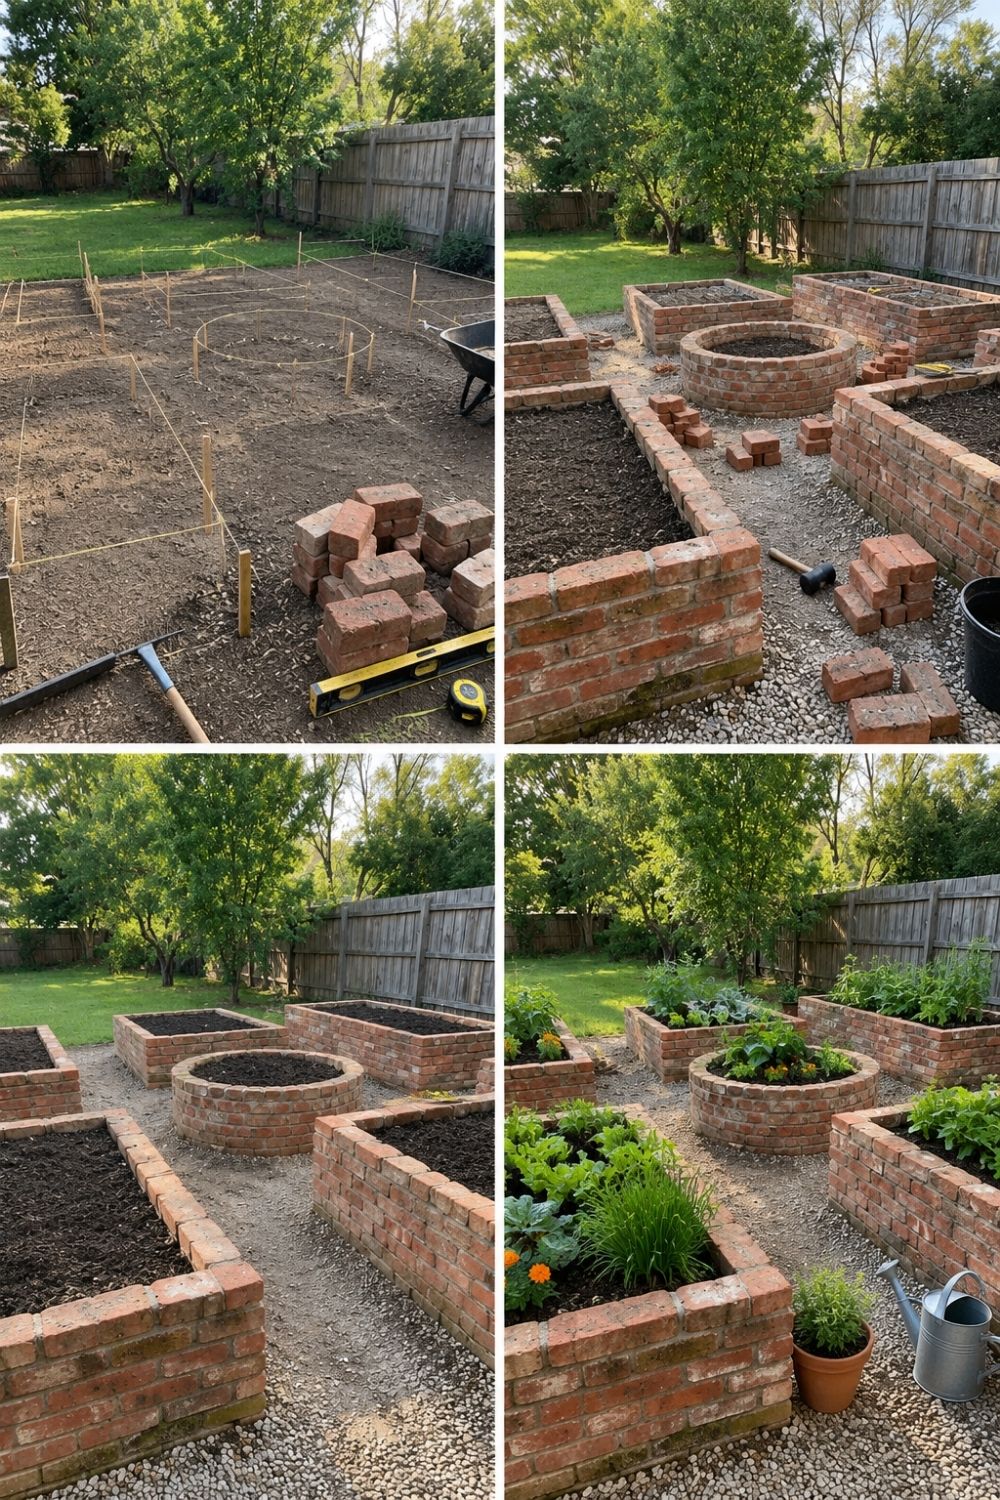
Photo by SassyGarden
The four stages above show a bare yard marked out with string, low brick walls going up, the beds filled with soil on a gravel floor, and finally planted. Unlike edging, raised beds are small walls, so the bricks need mortar and a solid footing, usually a concrete strip or a well-compacted gravel trench below the first course. Anything taller than about 2 feet starts to act as a retaining wall, and that’s worth talking over with a professional. For how raised beds compare in general, from height to soil mix, see are raised garden beds worth it.
7. A flush mowing strip on a gravel base
A mowing strip is brick edging laid flat and level with the lawn, so one wheel of the mower rolls along it. The payoff: no more trimming the edge by hand after every mow.
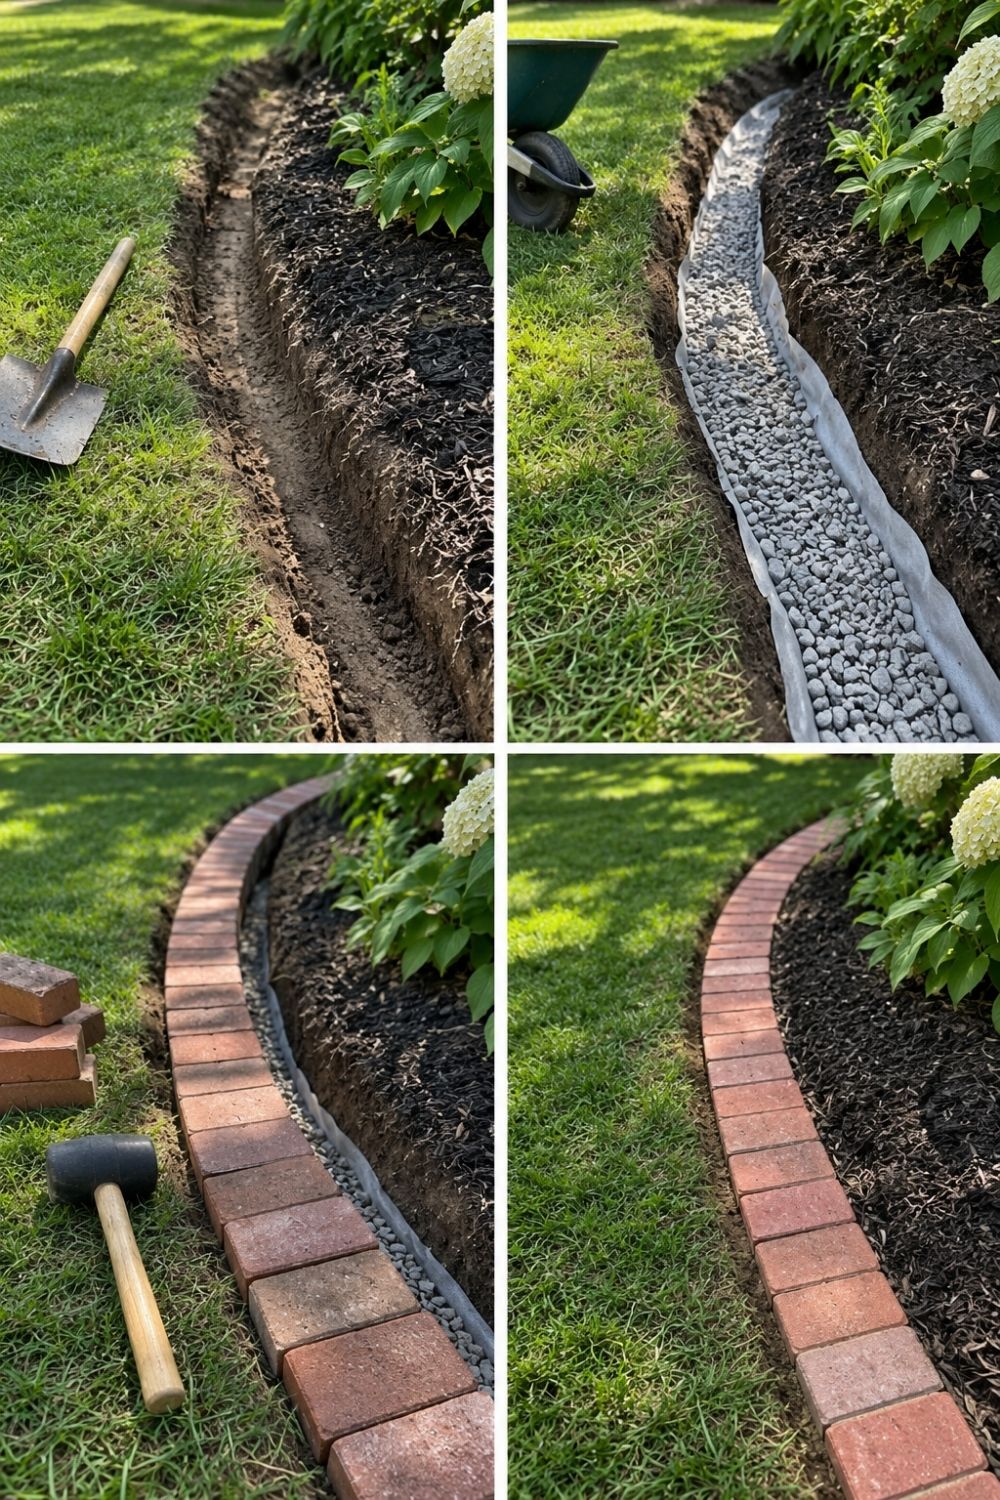
Photo by SassyGarden
The photo shows the method step by step: cut a trench, line it with fabric and fill it with compacted gravel, lay the bricks flat on top, and backfill both sides. Set the bricks a little below the lawn surface rather than above it, or the mower blade will hit them. A gravel base under brick edging also helps drainage along the bed; if you like the look of loose stone, the same idea continues in my post on river rock landscaping.
8. Brick softened with creeping groundcover
Brick edging can look stiff when it runs along a bed in a perfectly clean line. Low creeping plants spilling over the edge soften it and make the border look settled rather than freshly installed.
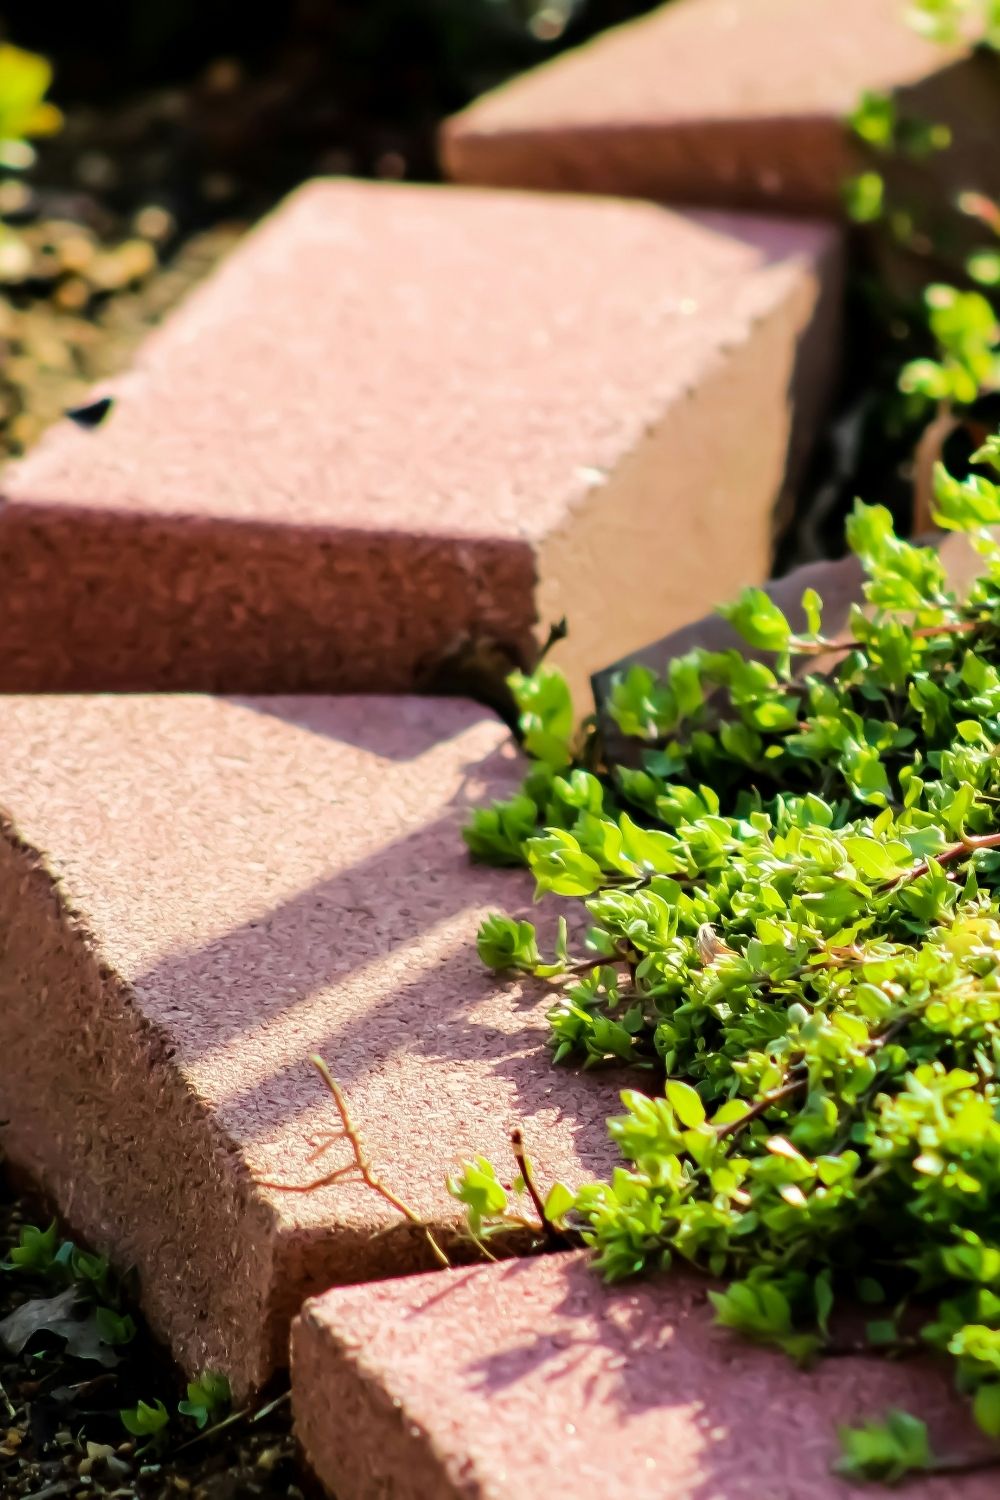
Photo by Crystal Jo on Unsplash
Good candidates for brick borders in sun are creeping thyme (Thymus serpyllum, zones 4–8) and stonecrops such as Sedum species; in part shade, try creeping Jenny (Lysimachia nummularia) in a contained spot. Creeping Jenny spreads aggressively and is listed as invasive in parts of the US, so check your state’s list first, or use golden creeping sedum or a small hosta instead. Keep the plants from covering the path completely, or the edge disappears along with them.
9. Reclaimed brick for an older-looking garden
Reclaimed brick, salvaged from old walls and chimneys, has chipped corners, faded color and bits of old mortar that new brick can’t copy. It suits cottage gardens and older houses, and it often costs less than new paving brick.
The catch is frost. Many old bricks were made for walls, not for lying on wet ground, and in cold zones they can absorb water, freeze and flake apart within a few winters. For paths and edging in anything below about zone 7, use brick rated for paving (in the US, clay pavers rated SX for severe weathering), and keep reclaimed brick for raised beds, low walls and decorative spots where it stays drier. Old bricks from chimneys can also carry soot, so skip those for vegetable beds.
10. A sawtooth edge
A sawtooth (or dogtooth) edge sets bricks on end at a 45-degree angle, so the top forms a row of points. It shows up in Victorian gardens and suits formal beds, cottage borders and anywhere a plain soldier course feels too plain.
It takes more bricks than a straight row, since each one overlaps its neighbor, and it works best on straight or gently curved edges. Set it the same way as a soldier course, with two thirds of each brick below ground, and use a string line to keep the points level. The pattern draws the eye, so it earns its place along a path or a front bed more than hidden at the back of the yard.
Start with the edge that bothers you most, get the base right, and use brick made for the ground. A single row of well-set brick edging will outlast most of the plants it frames.