
When people plan a garden path, they usually start with the material: gravel or stone, brick or pavers. It matters, but it’s rarely what makes a path look good. Two gravel paths can look completely different, one crisp and welcoming, the other like a leftover strip of driveway. The difference comes from width, shape, edges, planting and where the path actually leads. Get those right, and even the simplest material looks beautiful.
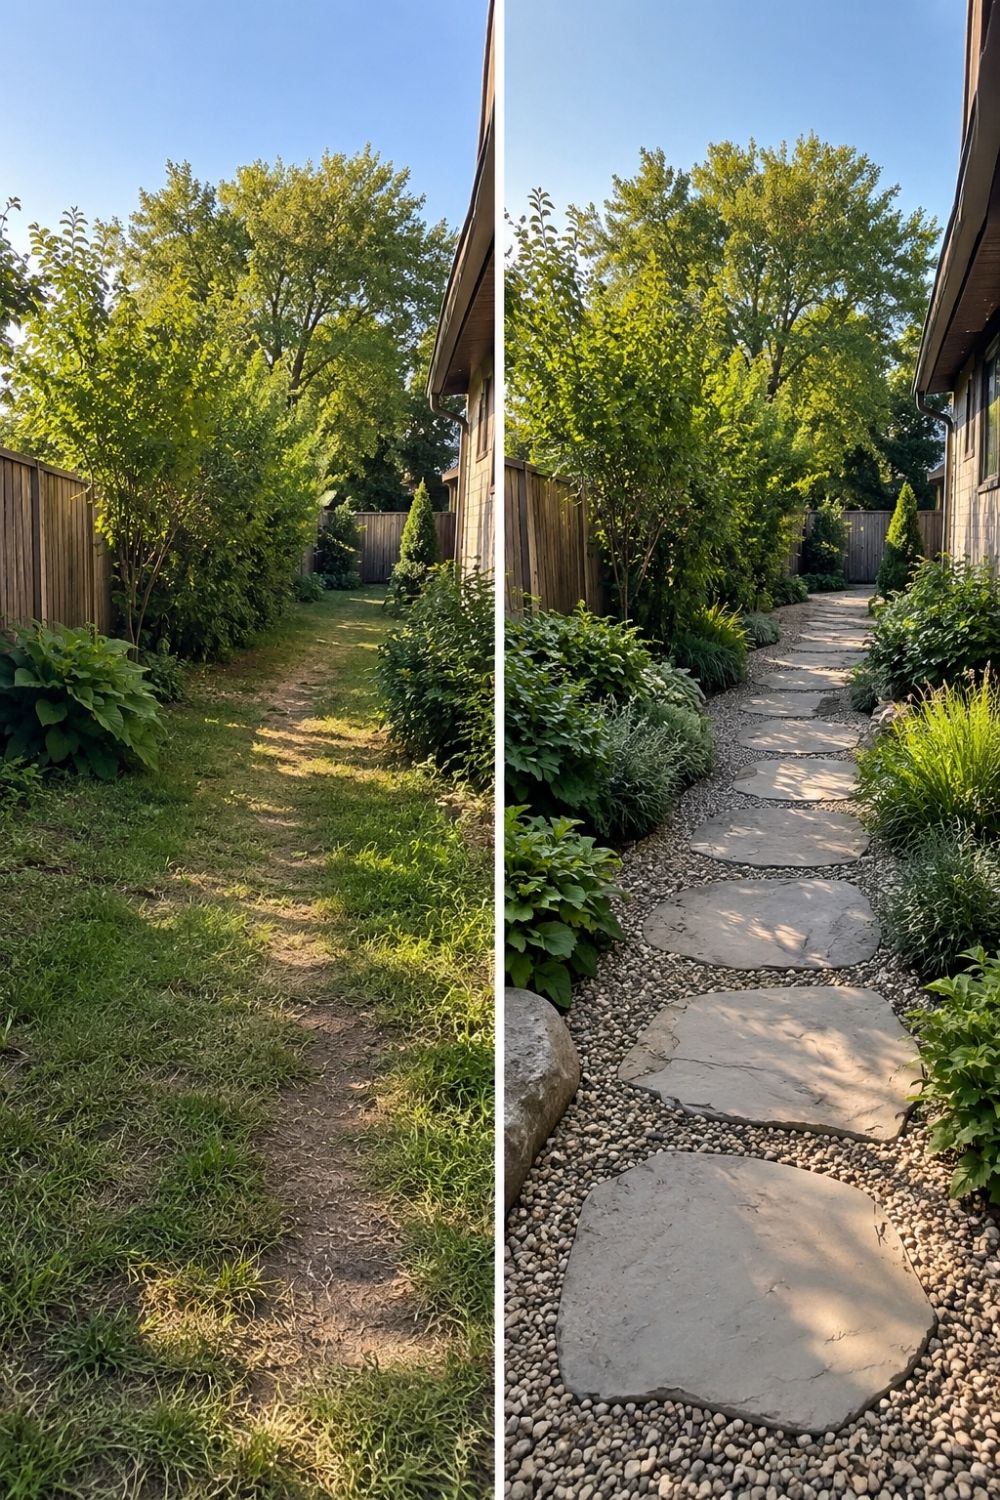
Photo by SassyGarden
The before and after above shows a narrow side yard between a house and a fence. In the first photo, a worn dirt track runs through patchy grass where everyone has been walking. In the second, large flat stepping stones set in pale gravel follow the same route, with hostas and grasses planted along both sides. The line of the path didn’t change; it simply followed the route people were already taking, which is one of the best rules there is.
Get the width right
Most garden paths are too narrow. A path that looks generous on a plan quickly shrinks once plants start leaning over it.

Photo by Anderson Wei on Pexels
This curving garden walkway of long gray stone slabs set in white pebbles, edged with a row of red bricks and framed by clipped shrubs, is wide enough to walk comfortably without brushing the plants. As a guide:
- About 3 feet (90 cm) for one person, which is the minimum for a main garden path.
- 4–5 feet (1.2–1.5 m) for two people side by side, or for a main path to the front door.
- 2 feet (60 cm) is enough for a secondary path through a border, used only for maintenance.
Add at least 6 inches on each side if plants will spill over the edges, and more if you’ll be pushing a wheelbarrow or mower. A wider path also simply looks more confident and intentional.
Let the line follow how people walk
A path should go where people naturally want to go. If it winds for no reason, visitors will cut the corner and wear a track across the lawn. If it runs dead straight in an informal garden, it can feel stiff.
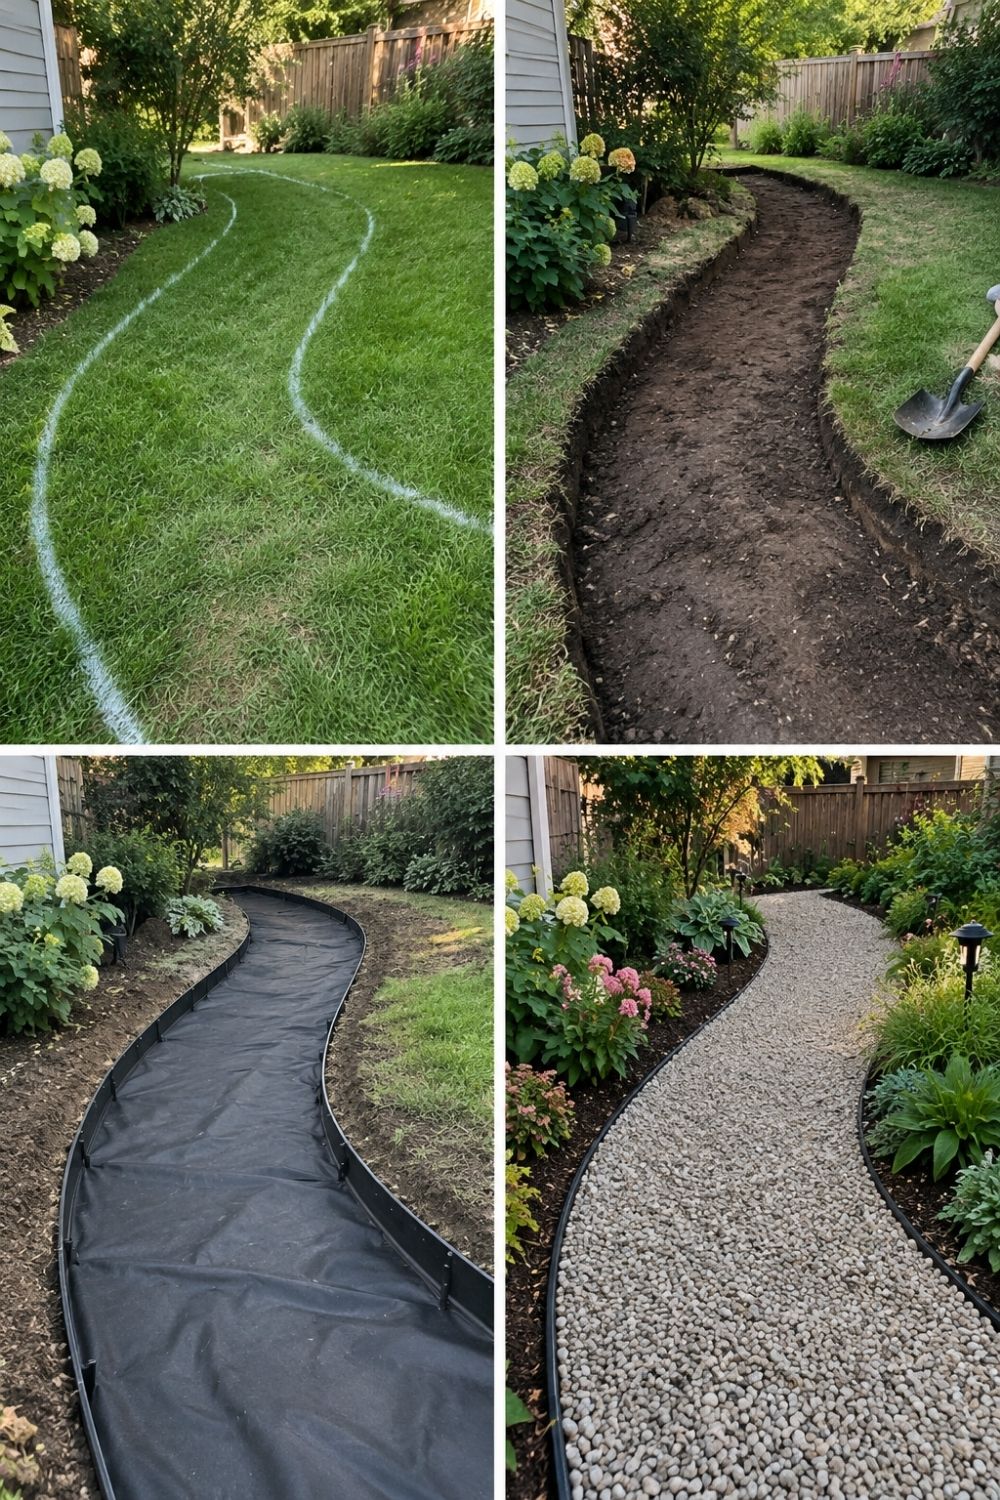
Photo by SassyGarden
The four stages above follow a curving gravel path through a lawn: first the outline marked on the grass with spray paint, then the turf dug out, then landscape fabric and black edging laid along the curves, and finally the finished path of pale gravel with planting along both sides. Lay a garden hose on the ground to try out shapes before you mark anything; it’s easy to move and shows curves clearly.
Make every curve look like it has a reason: going around a tree, a planted bed or a change in level. Broad, gentle curves look better than tight wiggles. And in a formal garden, or where the path leads straight to a front door, a straight line is often the right choice. For inspiration on both styles, Yardzen’s garden path ideas from their landscape design team are worth a browse.
Give it somewhere to go
A path that leads nowhere feels unfinished. The best garden paths end at something: a bench, a gate, a shed, a view or a focal point.

In this photo, irregular gray stepping stones cross a bed of red mulch between lush tropical plants and lead toward a textured stone wall with a window, clearly drawing you toward the house. Even a short path gains presence when it has a clear destination. If yours doesn’t, create one: a pot, a birdbath, a bench or a small statue at the end gives the eye a reason to follow. My post on garden statues and sculptures covers how to choose and place one.
The opposite trick works just as well. A garden path that disappears around a shrub, through an arch or behind a hedge creates a little mystery and makes a small garden feel bigger, because you can’t see everything at once. Even in a narrow yard, one curve that hides the far end of the path is enough to make people want to walk down it.
Edge it cleanly
Edging is the single detail that most separates a professional-looking path from a messy one. It holds loose materials in place, stops grass from creeping in and gives the path a crisp outline.
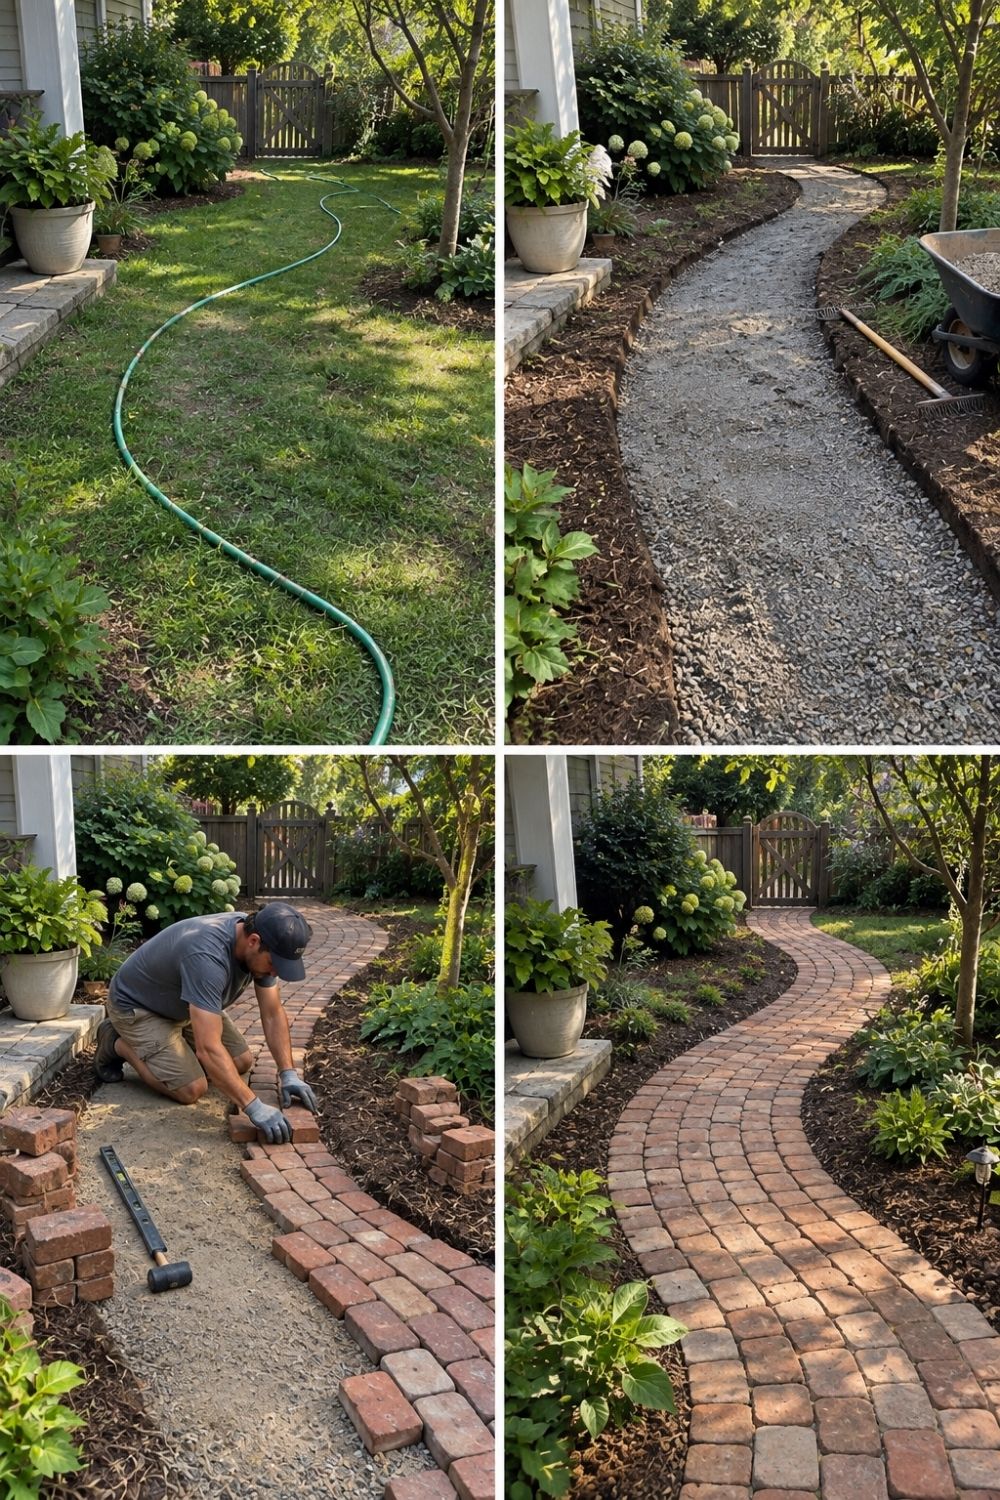
Photo by SassyGarden
The four stages above follow a brick path from start to finish: a garden hose marking the curving outline on the lawn, the trench dug and filled with a compacted gravel base, a person on their knees setting bricks in a sand bed, and the finished path of warm red brick with a soldier-course edge running between planted beds. Bricks set on end along the sides, called a soldier course, both frame the path and lock the field bricks in place.
Common edging choices:
- Steel or aluminum edging is nearly invisible, bends into smooth curves and suits gravel paths.
- Brick or stone edging adds color and texture and works with almost any style; my post on brick landscaping ideas has more.
- Plastic edging is cheap but tends to heave and look untidy over time.
- A cut edge in the lawn works for stepping stones, but needs trimming every few weeks.
Let plants soften the edges
A path with hard, bare edges looks new and unfinished. One with plants spilling over it looks as though it has always been there.
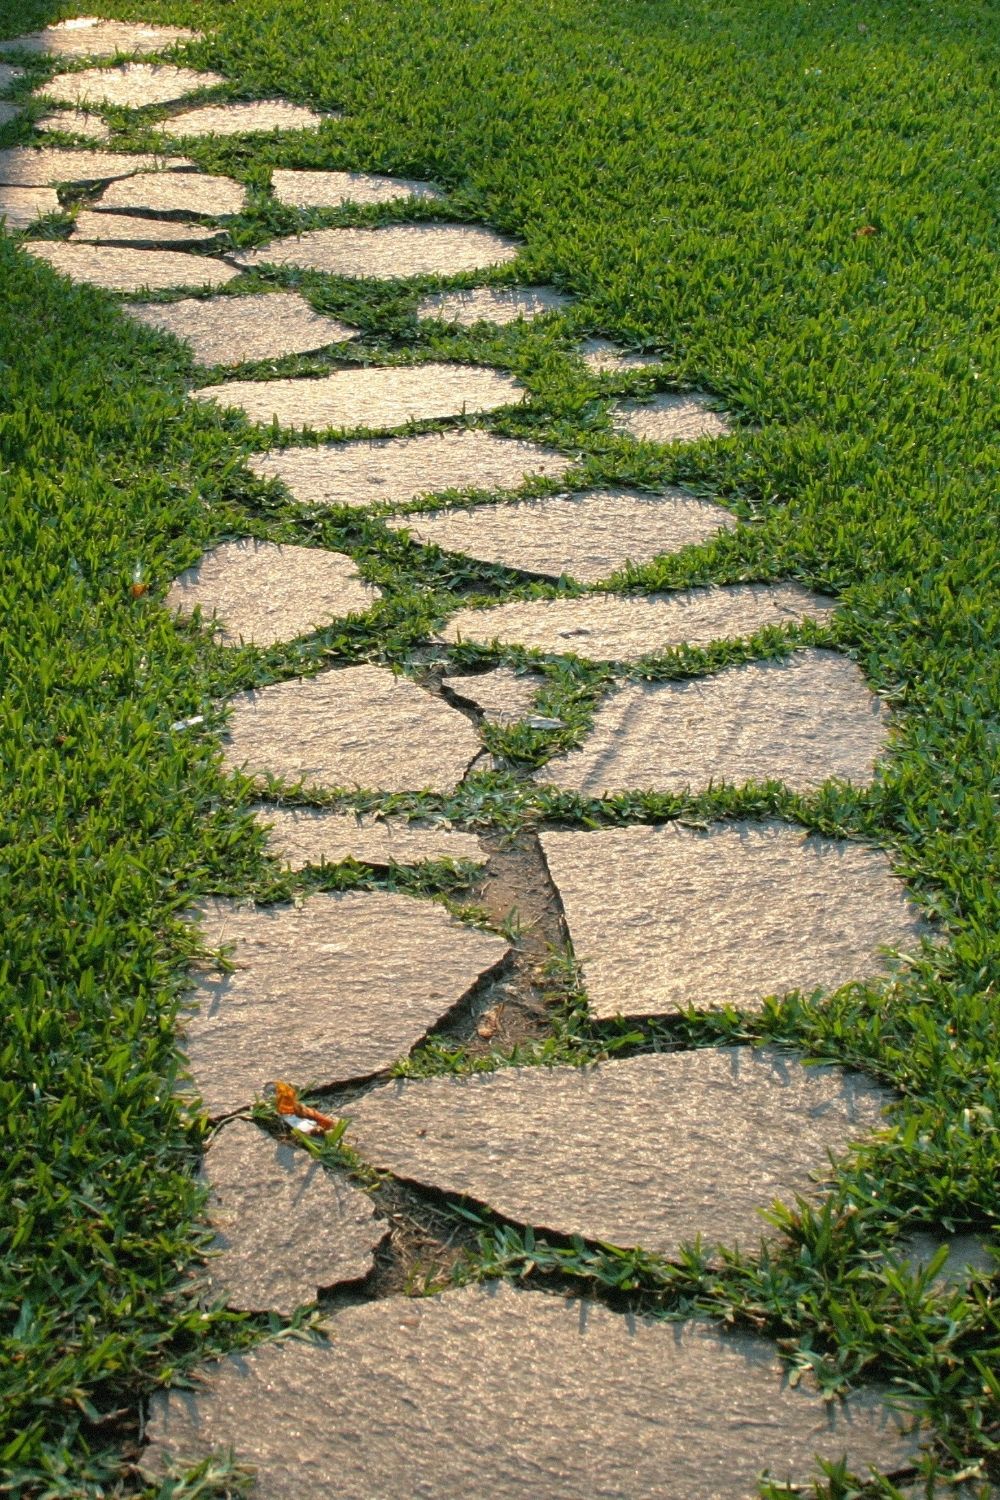
Photo by Luis Rodriguez on Unsplash
This stepping-stone path shows the idea in its simplest form: irregular flagstones set into a lawn, with grass growing right up to and between the stones, so the path blends into the garden. For stepping stones, space them about 18–24 inches apart, center to center, to match a comfortable stride. Set them level with the soil or lawn so a mower can pass straight over them.
Low, tough plants make the best edgers and fillers between stones: creeping thyme, chamomile, sedum, mondo grass and blue star creeper can all take occasional footsteps. Along the sides, soft mounds of catmint, lavender, lady’s mantle and hardy geraniums spill over and blur the line. This relaxed look is one of the main ingredients of a cottage garden; my post on English cottage garden ideas shows how to use it.
Build a proper base
The part of a path you never see decides how long it looks good. Without a solid, well-drained base, pavers sink, gravel mixes with mud and stones wobble within a year or two.

Photo by Lingga Ciha Putra Putra on Pexels
This gray paver path, curving down a gentle slope between neat lawn and rounded shrubs, stays level and tidy because it sits on a firm, compacted base. For most paver and gravel paths, dig out 4–6 inches, lay landscape fabric, then add 3–4 inches of compacted crushed stone (not rounded pea gravel, which rolls underfoot). For pavers and bricks, finish with about an inch of sand before laying them.
Give the path a slight slope to one side, about a quarter inch per foot, so rain runs off instead of pooling. If water already collects where your path will go, fix that first; my post on backyard drainage problems covers the options. Gravel and stepping stones set in gravel are permeable, so they let rain soak into the ground rather than running off.
Match the path to the house
A garden path looks best when its material and style echo something already there. Brick paths suit brick houses and older gardens; gray pavers or cut stone suit clean-lined houses and patios; gravel and stepping stones feel right in cottage, woodland and Mediterranean gardens. Pick up a color from the house walls, the roof, the patio or an existing wall, and the garden path will look as though it was always part of the plan.
Keep the number of materials low. One main material plus one for edging is usually enough; three or four different surfaces in a small garden quickly look busy. If you need to combine gravel with stepping stones, or brick with pavers, repeat the same combination on every path so the garden reads as one design.
Handle slopes with steps
On a gentle slope, a garden path can simply follow the ground. Once it gets steeper than about 1 in 12, a few low steps are safer and look better than a ramp of loose gravel. Keep all the steps in a flight the same height, ideally 5–6 inches, with treads at least 12–15 inches deep, and use the same material as the path for the treads so the route feels continuous. A handrail is worth adding for any flight of more than three steps.
Light it for the evening
A garden path that disappears at dusk is only half used. A few low lights along the edges make it safe and turn it into a feature after dark.

Photo by SassyGarden
The before and after above shows a narrow side path of large stepping stones beside a house, first with sparse planting and nothing to light it, then with lush hostas, ferns and grasses along the edges and small path lights casting warm pools of light onto each stone at dusk. Stagger the lights on alternating sides, aim them down at the path and choose warm white for a soft glow. Solar lights make it easy; I covered placement and care in my post on solar garden lighting ideas.
Common garden path mistakes
- Too narrow. Plants grow, and a 2-foot path becomes a squeeze by midsummer.
- Stepping stones spaced for nobody’s stride. Walk the route first and mark where your feet naturally land.
- Pointless curves. People will cut across them and wear a new track.
- No edging on gravel paths. Gravel ends up in the lawn and soil ends up in the gravel.
- Skipping the base. Stones and pavers laid straight on soil sink and tilt within a season.
- Too many materials. A busy mix of surfaces makes a small garden feel cluttered.
Choosing the material
Once the width, line, edges and base are sorted, the material is mostly a question of style, budget and how the path will be used:
| Material | Cost | Feel | Upkeep |
|---|---|---|---|
| Gravel | Low | Informal, crunchy, permeable | Raking and topping up; weeds without fabric |
| Stepping stones | Low to medium | Relaxed, natural | Trimming around stones |
| Brick | Medium | Warm, traditional | Occasional re-leveling and weeding joints |
| Pavers or cut stone | Medium to high | Smooth, formal | Low; sweep and refill joints |
| Wood chips or bark | Very low | Woodland, soft | Top up yearly |
For anyone using a wheelchair, walker or stroller, choose a firm, smooth surface like pavers, brick or compacted decomposed granite, and make the path at least 3 feet wide. Loose gravel and widely spaced stepping stones are much harder to navigate. For more gravel and stone ideas, see my post on river rock landscaping.
Next time you admire a path in someone else’s garden, look past the material. Notice how wide it is, how it curves, how cleanly it’s edged, how the plants spill over it and where it takes you. Those are the choices that make a garden path look really good, and every one of them works just as well with a budget material as with an expensive one.